I was writing about how to parse C++17-style hex floating point literals, and in doing so I ended up writing a bunch about how floats work in general (and specifically how floating point rounding happens), so I opted to split it off from that post into its own, since it’s already probably way too many words as it is?
Here we go!
How Floats Work
If you don’t know, a floating point number (At least, an IEEE 754 float, which effectively all modern hardware supports), consists of three parts:
Sign bit – the upper bit of the float is the sign bit: 1 if the float is negative, 0 if it’s positive.
Exponent – the next few bits (8 bits for a 32-bit float, 11 bits for a 64-bit float) contain the exponent data, which is the power of two to multiply the given hex value with. (Note that the exponent is stored in a biased way – more on that in a moment)
Mantissa – the remaining bits (23 for 32-bit float, 52 for a 64-bit float) represent the fractional part of the float’s value.
In general (with the exception of subnormal floats and 0.0, explained in a bit) there is an implied 1 in the float: that is, if the mantissa has a value of “FC3CA0000” the actual float is 1.FC3CA0000 (the mantissa bits are all to the right of the decimal point) before the exponent is applied. Having this implied 1 gives an extra bit of precision to the value since you don’t even have to store that extra 1 bit anywhere – it’s implied! Clever.
The exponent represents the power of two involved (Pow2(exponent)), which has the nice property that multiplies or divides of a float by powers of two do not (usually, except at extremes) affect the precision of the number, dividing by 2 simply decrements the exponent by 1, and multiplying by 2 increments the exponent by 1.
For a double-precision (64-bit) float, the maximum representable exponent is 1023 and the minimum is -1022. These are stored in 11 bits, and they’re biased (which is to say that the stored 11 bits is actualExponent + bias where the bias is 1023. That means that this range of [-1022, 1023] is actually stored as [1, 2046] (00000000001 and 11111111110 in binary). This range uses all but two of the possible 11-bit values, which are used to represent two sets of special cases:
Exponent value 00000000000b represents a subnormal float – that is, it still has the effective exponent of -1022 (the minimum representable exponent) but it does NOT have the implied 1 – values smaller than this start to lose bits of precision for every division by 2 as it can’t decrement the exponent any farther and so ends up sliding the mantissa to the right instead.
For this 00000000000b exponent, if the mantissa is 0, then you have a value of 0.0 (or, in a quirk of floating point math, -0.0 if the sign bit is set).
Exponent value 11111111111b represents one of two things:
If the mantissa is zero, this is infinity (either positive or negative infinity depending on the sign bit).
If the mantissa is non-zero, it’s NaN (not a number).
(There are two types of NaN, quiet and signaling. Those are a subject for another time, but the difference bit-wise is whether the upper bit of the mantissa is set: if 1 it’s quiet, if 0 then it’s signalling).
If you wanted to write a bit of math to calculate the value of a 64-bit float (ignoring the two special exponent cases) it would look something like this (where bias in this case is 1023):
Okay, knowing how floats are stored, clearly math in the computer isn’t done with infinite precision, so when you do an operation that drops some precision, how does the result get rounded?
When operations are done with values with mismatched exponents, the value with the lowest exponent is effectively shifted to the right by the difference to match the exponents.
For example, here’s the subtraction of two four-bit-significand (3 bits of mantissa plus the implied 1) floats:
1.000*2^5-1.001*2^1
The number being subtracted has the smaller exponent, so we end up shifting it to the right to compensate (for now, doing it as if we had no limit on extra digits):
1.0000000*2^5-0.0001001*2^5// Shifted right to match exponents------------------0.1110111*2^51.110111*2^4// shifted left to normalize (fix the implied 1)1.111*2^4// round up since we had more than half off the edge
Note that in this example, the value being subtracted shifted completely off the side of the internal mantissa bit count. Since we can’t store infinite off-the-end digits, what do we do?
Float math uses three extra bits (to the “right” of the mantissa), called the guard bit, the round bit, and the sticky bit.
As the mantissa shifts off the end, it shifts into these bits. This works basically like a normal shift right, with the exception that the moment that ANY 1 bit get shifted into the sticky bit, it stays 1 from that point on (that’s what makes it sticky).
For instance:
G R S
1.001000*2^10.100100*2^2// 1 shifts into the guard bit0.010010*2^3// now into the round bit0.001001*2^4// now into the sticky bit0.000101*2^5// sticky bit stays 1 now
Note that the sticky bit stayed 1 on that last shift, even though in a standard right shift it would have gone off the end. Basically if you take the mantissa plus the 3 GRS bits (not to be confused with certain cough other meanings of GRS) and shift it to the right, the operation is the equivalent of:
Now when determining whether to round, you can take the 3 GRS bits and treat them as GRS/8 (i.e. GRS bits of 100b are the equivalent of 0.5 (4/8), and 101b is 0.625 (5/8)), and use that as the fraction that determines whether/how you round.
The standard float rounding mode is round-to-nearest, even-on-ties (that is, if it could round either way (think 1.5, which is equally close to either 1.0 or 2.0), you round to whichever of the neighboring values is even (so 1.5 and 2.5 would both round to 2).
Using our bits, the logic, then, is this:
If the guard bit is not set, then it rounds down (fraction is < 0.5), mantissa doesn’t change.
If the guard bit IS set:
If round bit or sticky bit is set, always round up (fraction is > 0.5), mantissa increases by 1.
Otherwise, it’s a tie (exactly 0.5, could round either way), so round such that the mantissa is even (the lower bit of the mantissa is 0), mantissa increments if the lower bit was 1 (to make it even).
Okay, so if all we care about is guard bit and then , why even have three bits? Isn’t two bits enough?
Nope! Well, sometimes, but not always. Turns out, some operations (like subtraction) can require a left shift by one to normalize the result (like in the above subtraction example), which means if you only had two bits of extra-mantissa information (just, say, a round and sticky bit) you’d be left with one bit of information after the left shift and have no idea if there’s a rounding tiebreaker.
For instance, here’s an operation with the proper full guard, round, and sticky bits:
1.000*2^5-1.101*2^1// Shift into the GRS bits:1.000000*2^5-0.000111*2^5// sticky kept that lowest 1------------------0.111001*2^51.11001*2^4// shift left 1, still 2 digits left1.110*2^5// Round down properly
If this were done with only two bits (round and sticky) we would end up with the following:
1.000*2^5-1.101*2^1// Shift into just RS bits:1.00000*2^5-0.00011*2^5------------------0.11101*2^51.1101*2^4// shift left 1, still 2 digits left
Once we shift left there, we only have one bit of data, and it’s set. We don’t know whether or not we had a fraction > 0.5 (meaning we have to round up) or < 0.5 (meaning we round to even, which is down in this case).
So the short answer is: three bits because sometimes we have to shift left and lose one bit of the information, and we need at least a “half bit” and a “tiebreaker bit” at all times. Given all the float operations, 3 suffices for this, always.
It’s been tricky to make much progress these last couple weeks – having a (non-gaming) coding job and being able to come home and work gets tricky, so a large majority of my game coding time is weekend time. Also, couple some deadlines at work, and you’ve got a large case of “I don’t want to code when I hit home.”
However: I did make a good deal of progress these last few weeks.
If you look at the screenshot in my last entry, it should be plain exactly HOW MUCH. Suddenly, my little experiment looks considerably like a GAME.
Particles Make Me Sneeze
The biggest hurdle for this section of the project was the general-purpose particle system. Even though I’ve done a bunch of crazy graphics-related stuff, a particle system has NEVER been on that list. But no longer!
For my particles, I wanted the following data:
Position (3D)
Rotation (around Z)
Image Index (which image in the particle map to use)
Scale (how big the particle is scaled, relative to the particle map’s specified world size)
The particle map mentioned in that list is a simple list of texture coordinates into the particle texture (Which contains images for all of the particles), as well as the size of a given particle in world space.
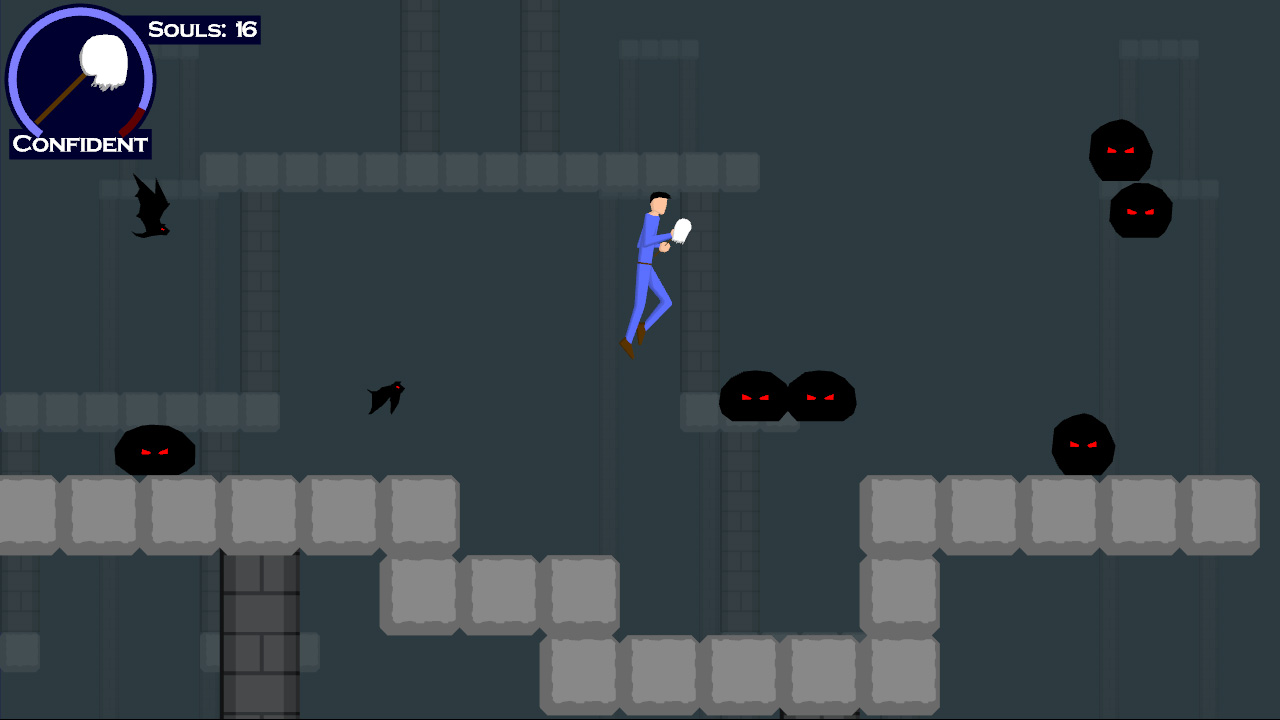
The particles in this system are actually rendered using shader constants (2 float4 shader constants per particle), which gave me right around 100 particles per draw call. On my PC, I can push the system up to 24,000 particles before it starts to slow down. On the Xbox 360, it’s closer to 6000. Both of those are well within my game’s target maximum of 2000 particles, and I could probably get that number higher if I had to.
The State Machine Tells Way Fewer Lies Than the Political Machine
One thing I learned when working on Mop of Destiny was how to set up a totally sweet state machine in C++. I got to port those concepts over to C#, which made it even EASIER, given all of the reflection support. Note that I do the majority of the reflection calls at application startup, so the expensive calls are already done when it’s time to do the actual game running.
Each state can have three functions associated with it: Begin, Tick, End.
Begin is called on the transition to that state from some other state.
Tick is called every time the state gets run (once per frame)
End is called on the transition from that state to some other state.
Also, each state can have a number of transitions associated. They take the form of: “BooleanFunction = TargetState”
Every frame, before calling tick, the state machine core will run each of the specified functions. When one of them evaluates to true, it switches states to the new TargetState, which will then be run (unless one of ITS transitions triggers). A state can also call the SetState function direction, but having the transitions in the function attribute makes it really easy to see where a state can transition to.
See You Later, Allocater!
One of the most important things that I have been doing with my code is ensuring that, during the run of a game level, no memory is allocated. At all. The reason is the .Net garbage collector (GC).
The GC, on Windows, is triggered every 2MB of allocations (among other scenarios, including low-memory and lost-focus cases). On the Xbox 360, the GC runs ever 1MB of allocations. Since the GC pauses all threads while it does its thing, it’s better that it’s never triggered during runtime…ESPECIALLY if the heap is complicated and garbage collection is going to take a while.
To handle this, I’ve created a few of my own data structures, including the OrderlessList. I’ve used OrderlessLists alot throughout my code. Simply stated, it’s an array (allocated at the time of the object with some maximum number of elements) in which the order of the objects is unimportant (i.e. it can be reordered and it doesn’t matter). Given the property of being able to reorder at any time, removal from the list is a simple matter of copying the last list over the top of the element being removed, then decreasing the reported size of the list.
For the bullets (both the player and the enemy bullets), there’s an OrderlessList of live bullets, and an OrderlessList of dead bullets. Whenever a bullet is needed, an object is retrieved from the dead bullet list, given its properties, and added to the live bullet list. Whenever a bullet dies (goes off-screen or hits an enemy), it is deactivated and returned from the live bullet list to the dead bullet list. No allocations necessary.
That’s right, it’s the ol’ “pool of objects so you don’t have to allocate” trick. But hey, it works!
Rambling Is For Cowboys, Not Coders
Alright, enough talk! Tomorrow is another day at work, so it’s likely I won’t make any more progress until next weekend.
In the meantime, death is but a door, time is but a window; I’ll be back.
A few things to talk about this entry (no screenshots, but there is an MP3 later):
Cube Farm
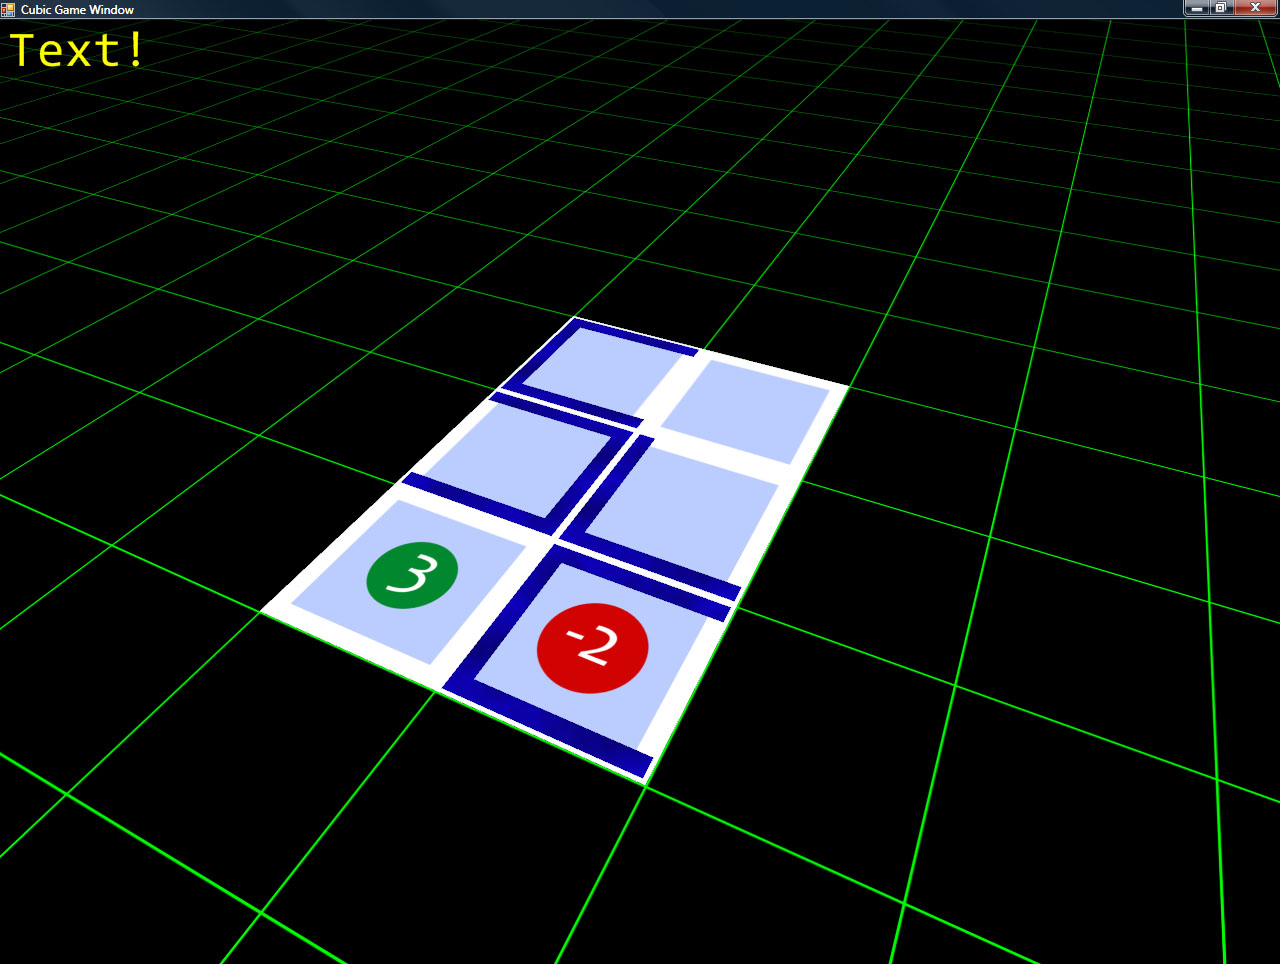
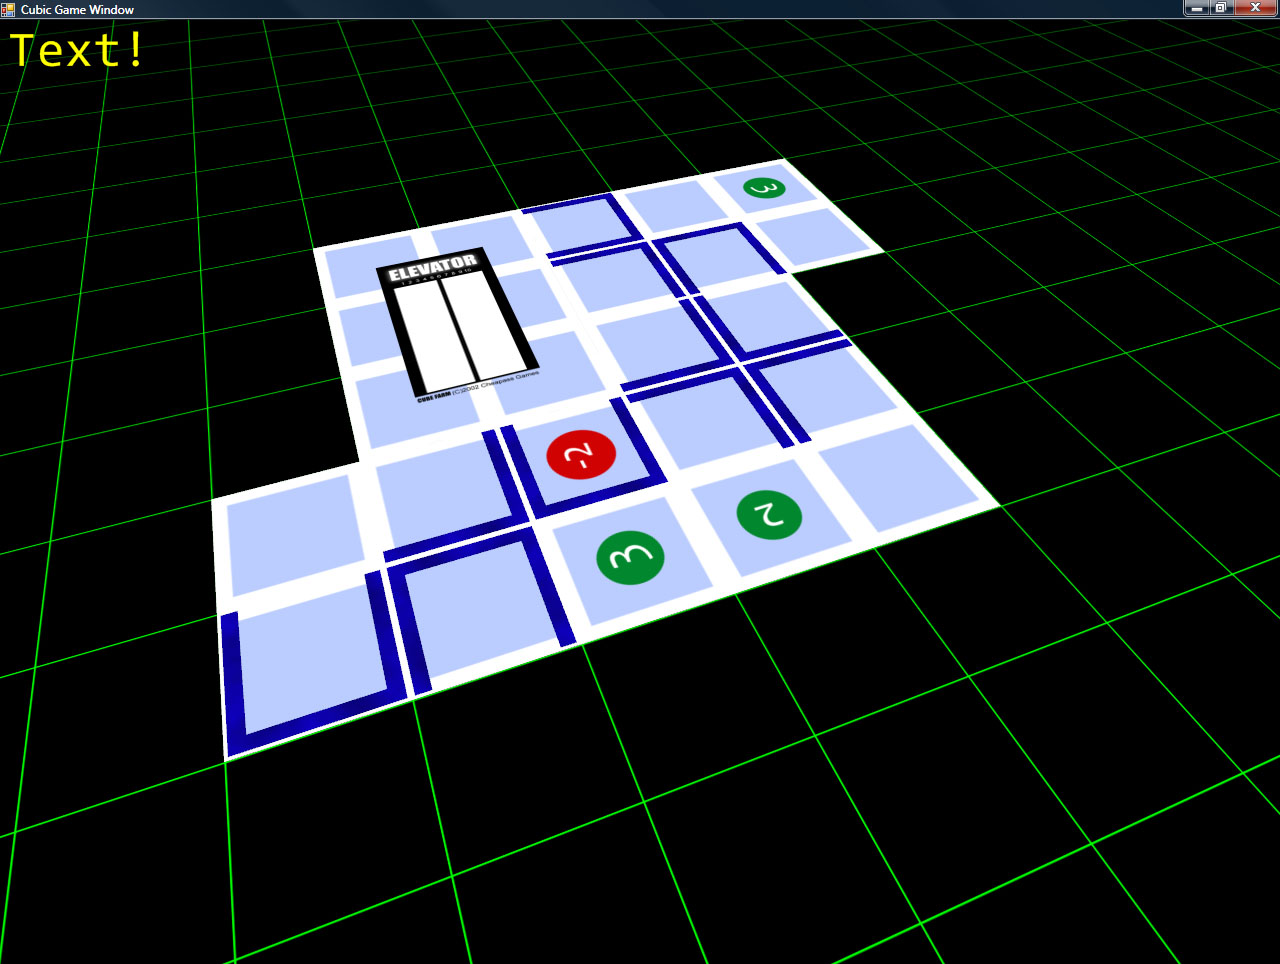
Cube farm is declared complete. I decided not to add any polish to it, because it was simply a test of my game development framework. It gave me a large list of things that I need to work on (better UI layout control, ability to put 3D objects into the UI, menuing systems, better input setup, etc) before moving on to the next game. Which brings us to…
The plan, however, is to have all of the entities and backgrounds be full 3D and make use of some of the higher-level features of my framework (some of which are actually implemented). These features include (but are not limited to):
Procedurally-generated textures (on-the-fly, cached in, no tiling)
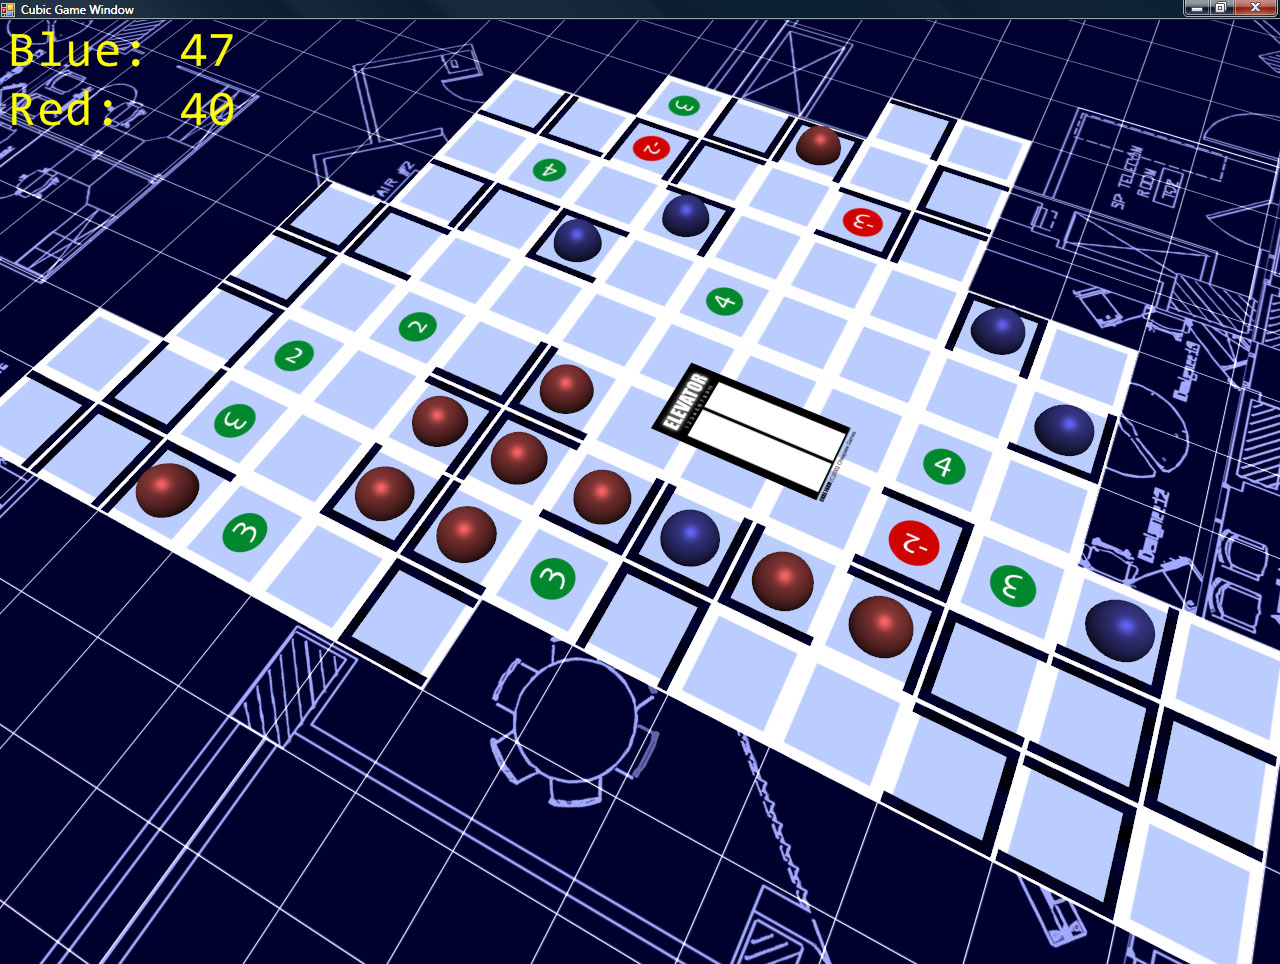
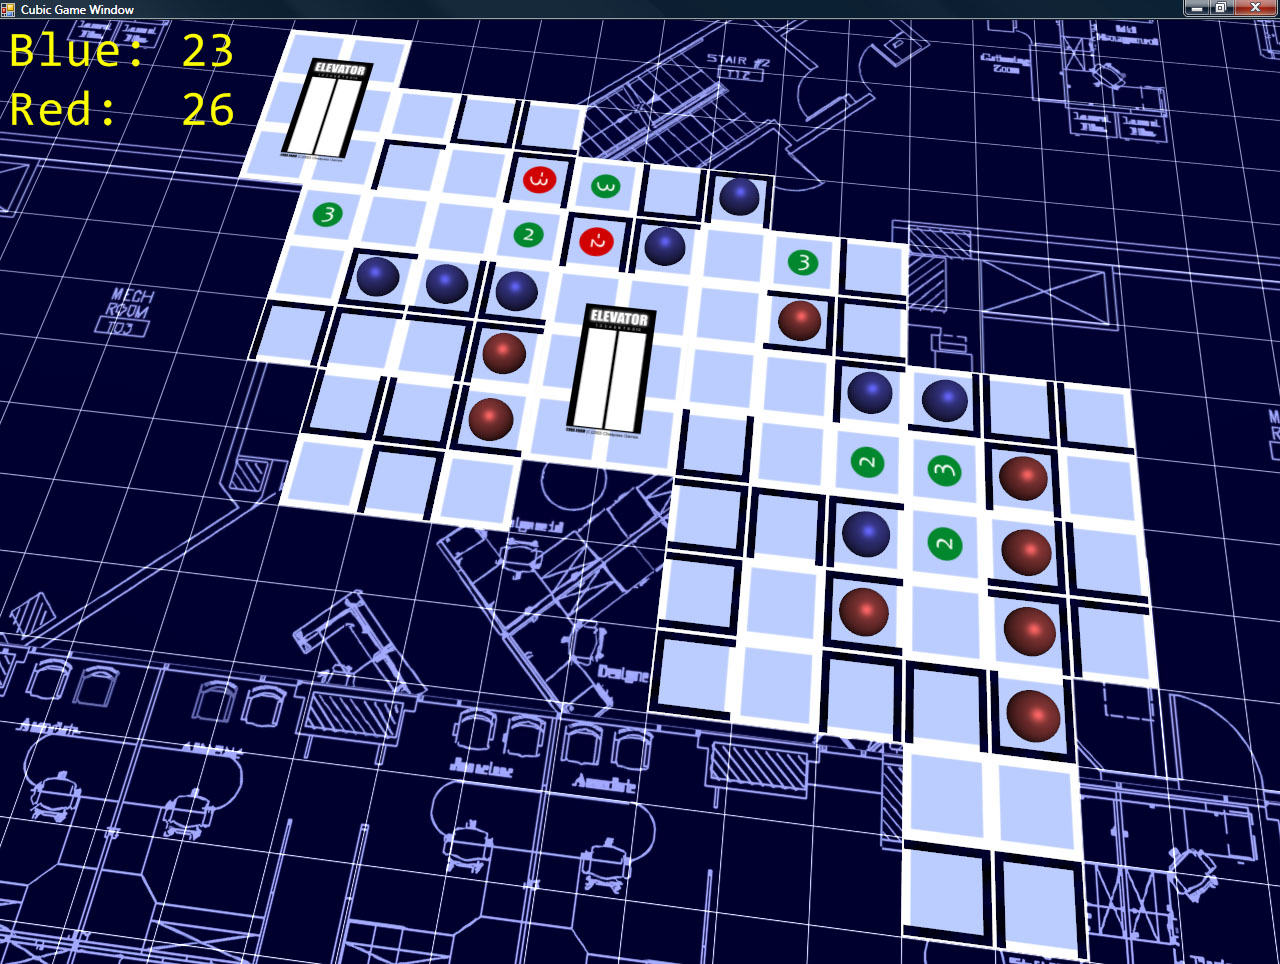
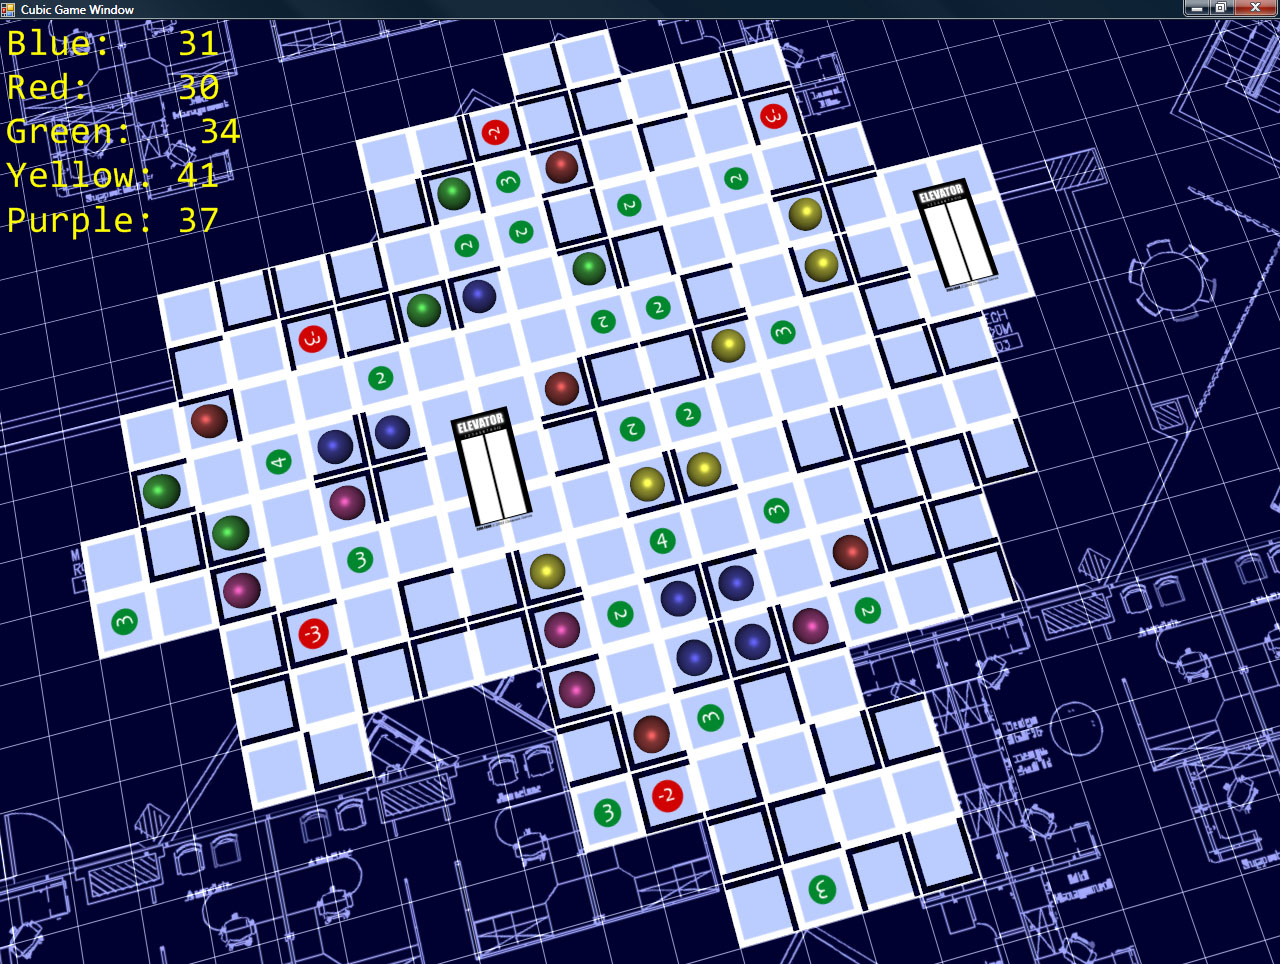
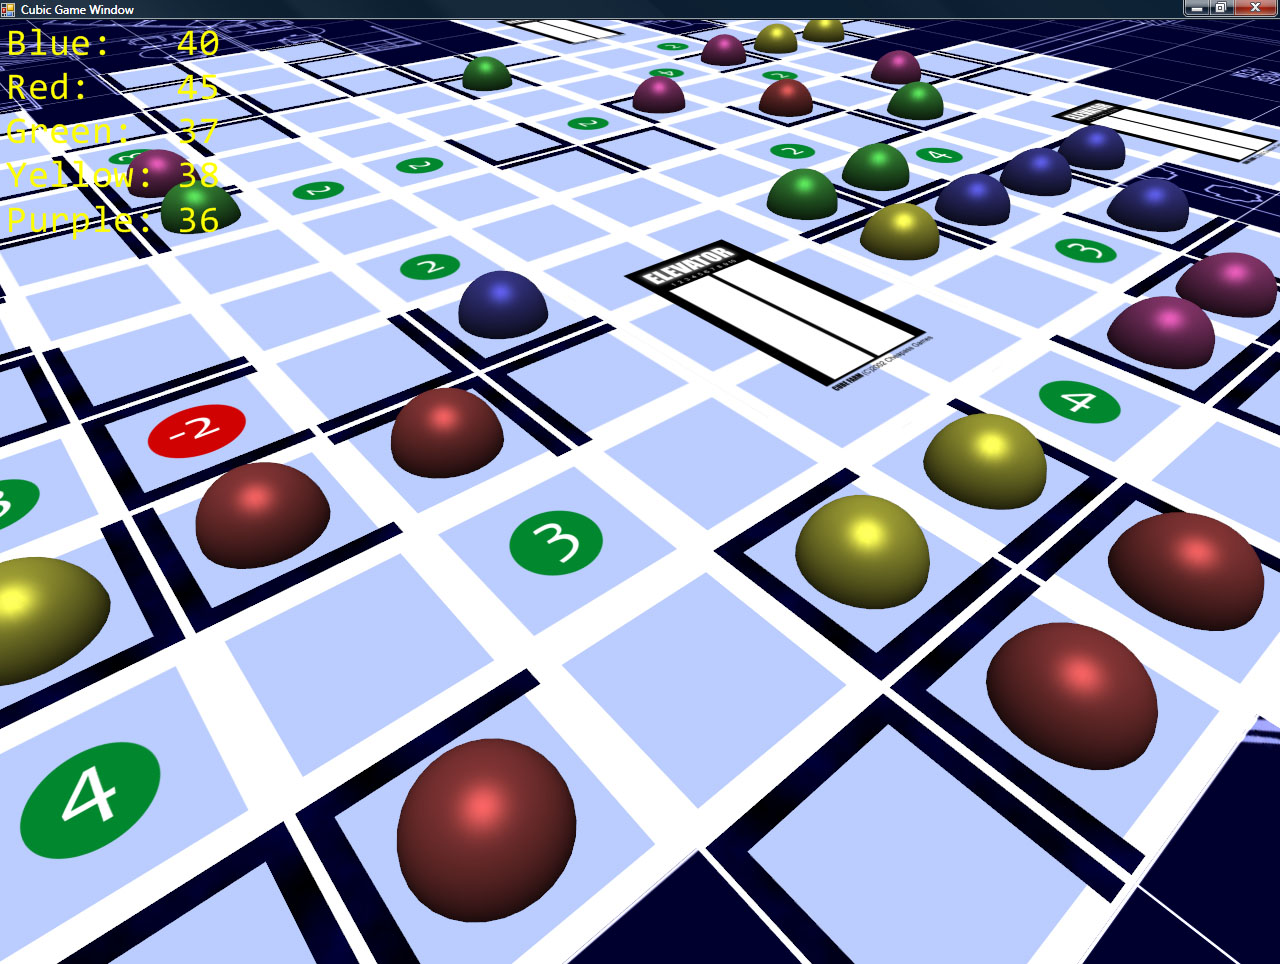
Well, I finally have all of the gameplay working. It supports 2-5 players, and is quite enjoyable.
I need to add a, you know…menu, stuff like that. Also, I would love for it to play networked, since it does kinda require the cards in one’s hand be a secret to the other players.
But, the gameplay logic is all done, the last of the (known) bugs is squashed, and it’s time to go play Super Paper Mario!
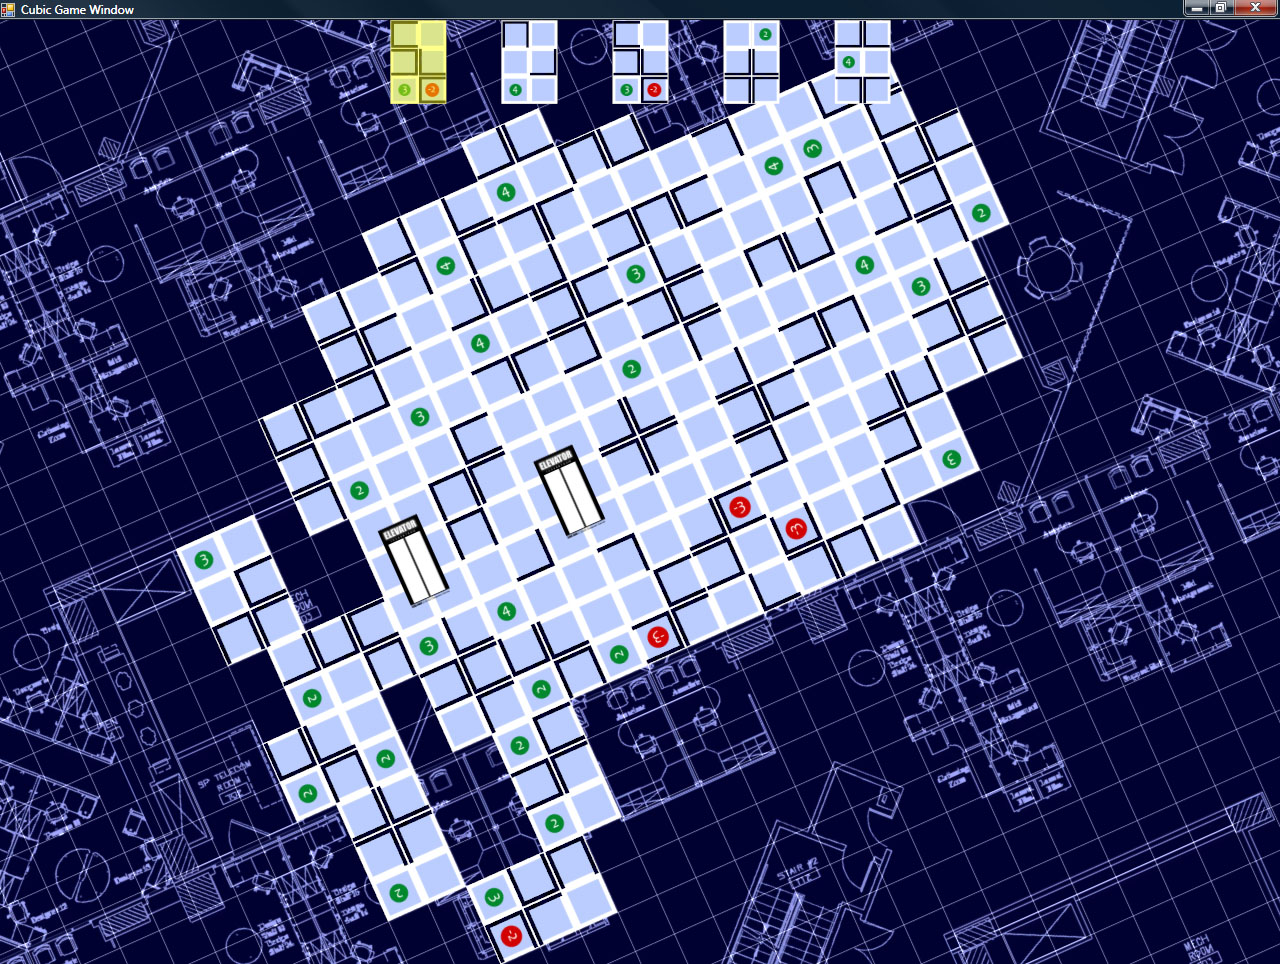
Cube Farm is coming along nicely – half of the gameplay is done.
In the game, for every turn, you place one card, and fill one cubicle (if possible). I have the card-placing portion done.
It involves filling in holes that are too small for a card to fit in as walkable floor space (for the purposes of determining if workers can reach the elevator). Any hole that has room for a card must remain open.
So now there’s a hand of cards to choose from, and you can select one and place it in a legal spot. Also done (though not visible), the code to determine which areas can reach the elevator and to determine how many points a given cubicle is worth is also in. Next up: worker placement!
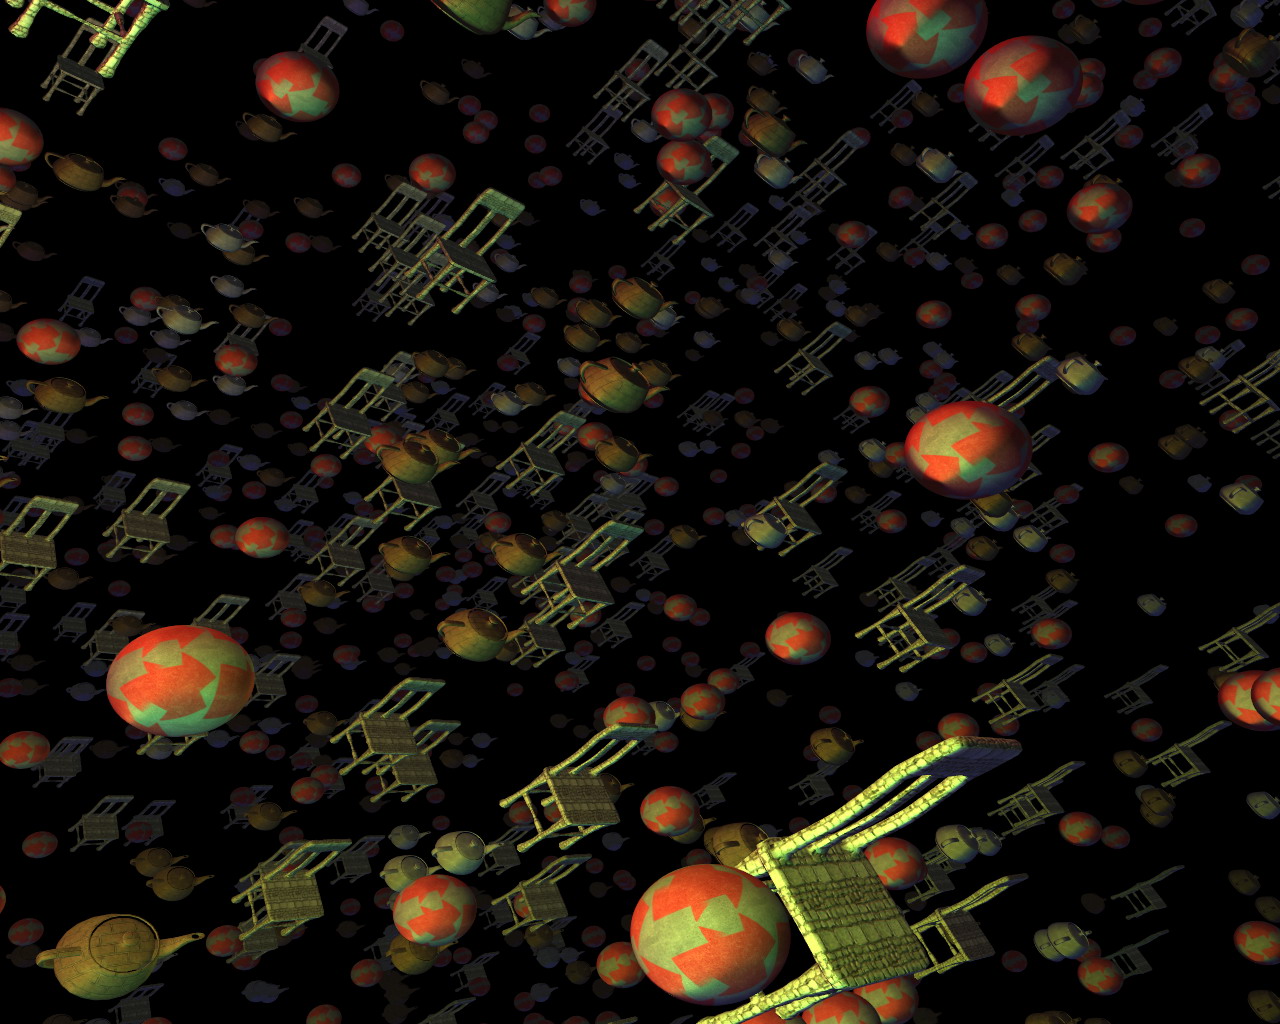
The first test of my scripting setup is going rather well. And it’s completely chairless.
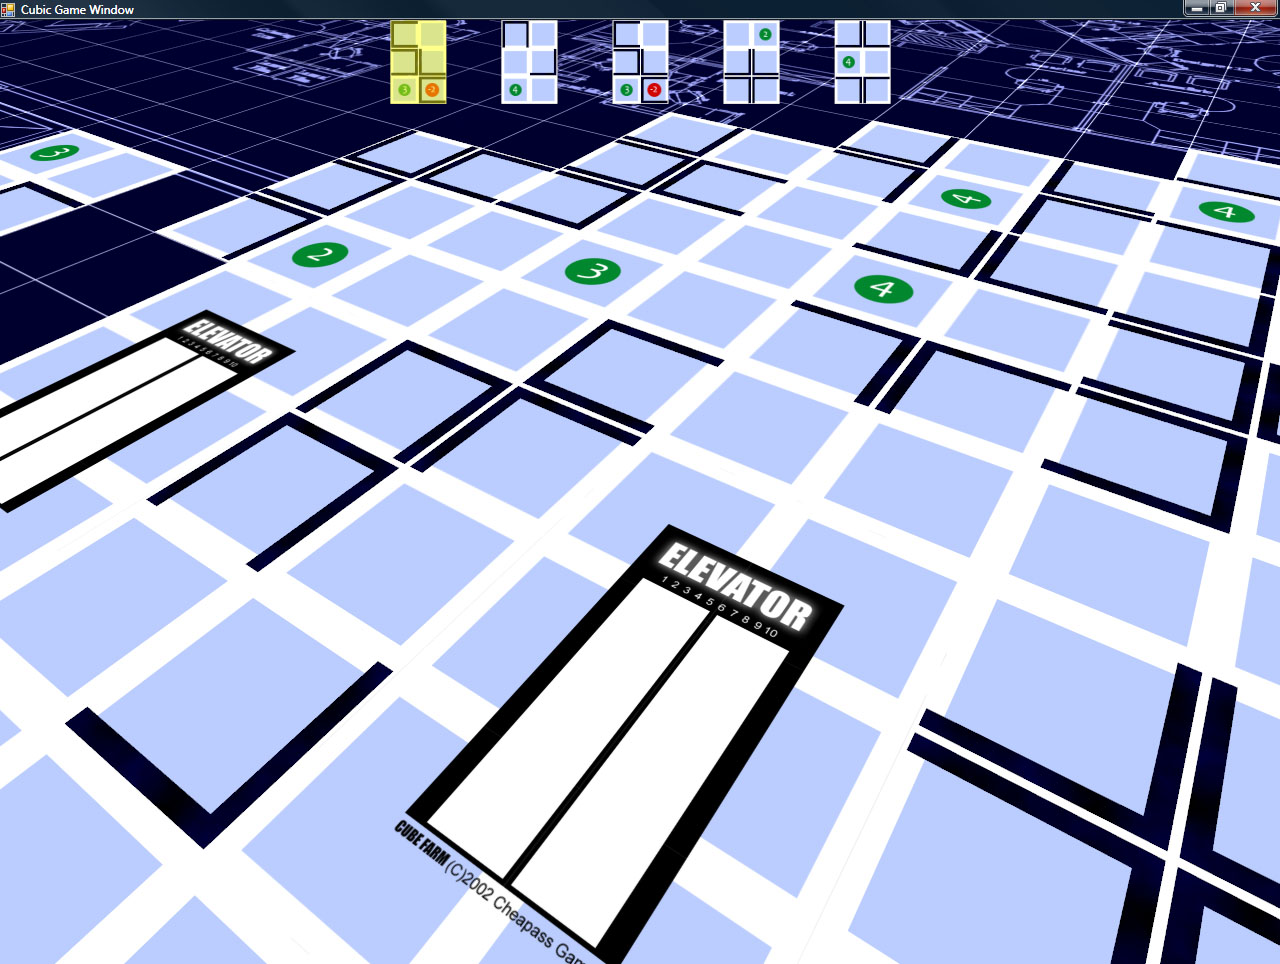
I have been working on converting over Cheapass Games’ “Cube Farm” into a digital format (which, sad to say, I’m never going to give out to anyone, what with copyright issues and the like. This is just my own internal test to make sure that I can do it), and it’s going rather well.
While I don’t have any of the scoring working yet, what I *DO* have is very promising. Namely, I have the cards displaying, and you can place them in the world.
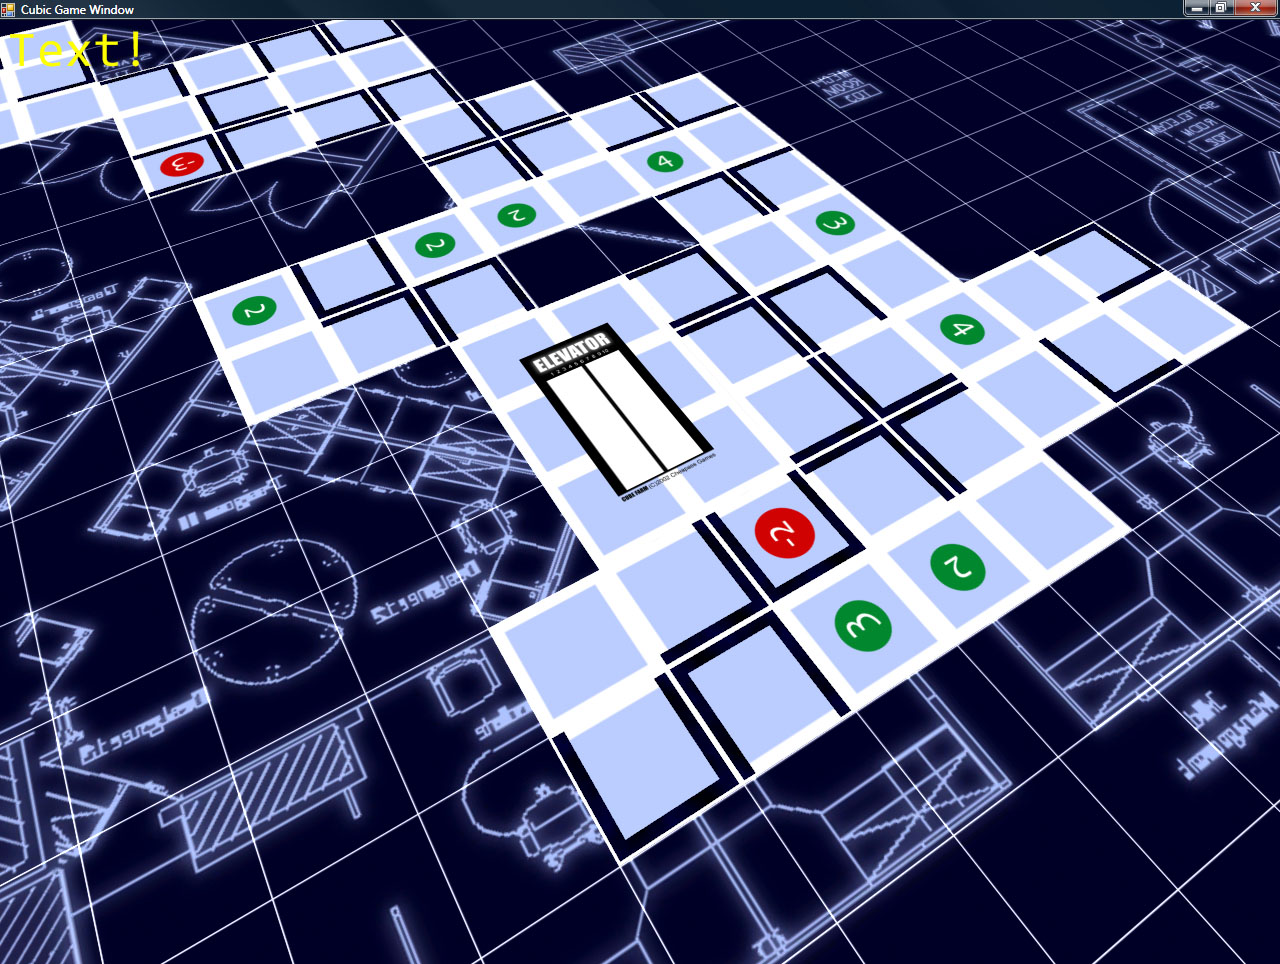
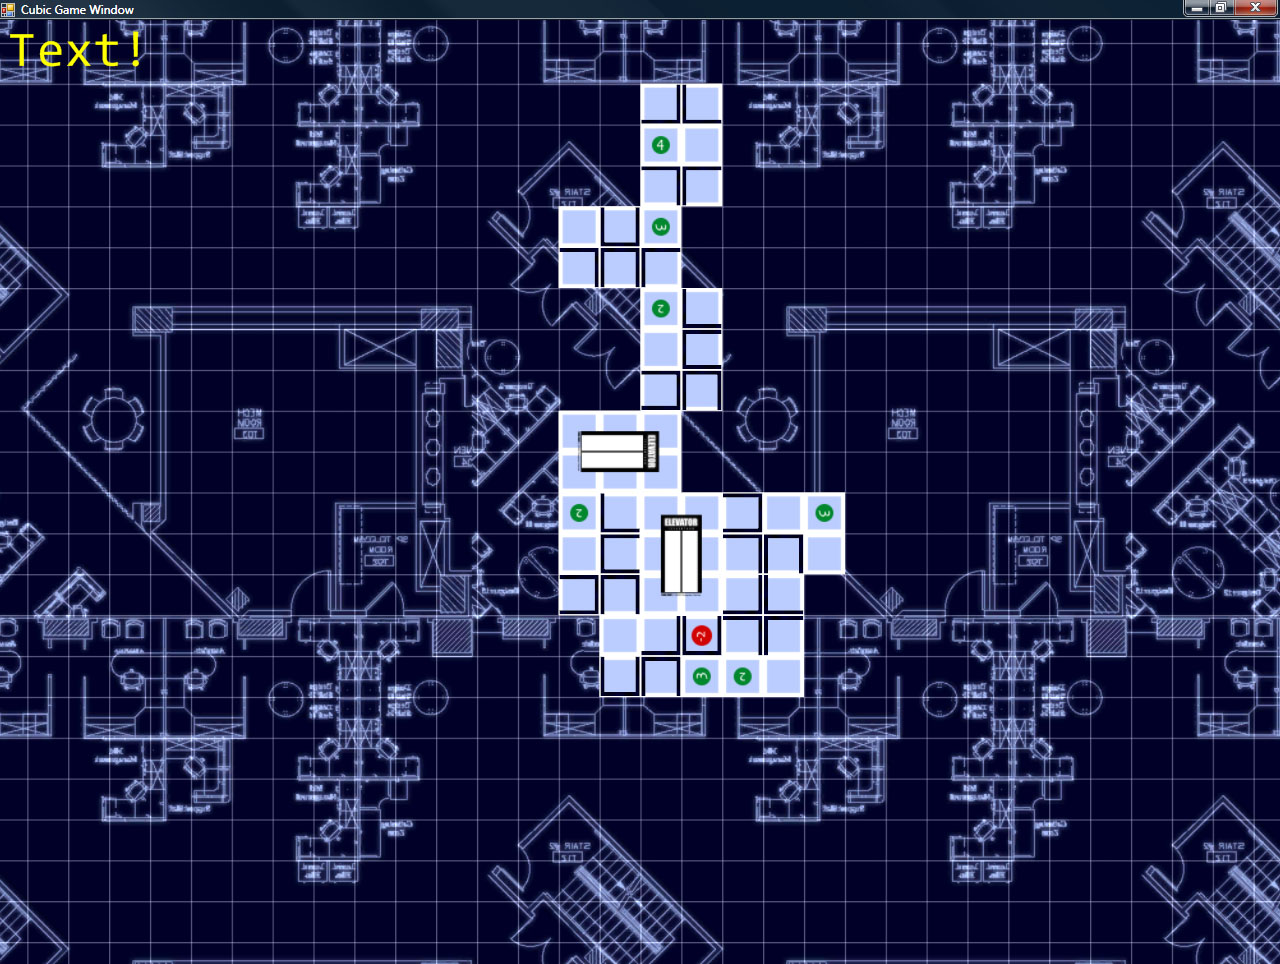
Also, I recently added a blueprint-style background which, while it’s a bit higher contrast than I’d like, is a bit more interesting (and fitting) than the original green-on-black grid.
Some screenshots!
The camera control is simple (and intuitive): hold down the right mouse button, and you can drag the grid around (to move the camera). Holding middle mouse lets you move the mouse left/right to spin the camera around the look-at point, and up/down zooms in and out (and also adjust the angle at which you’re viewing the board).
So, I’ve been working on the Intangibles. Otherwise known as the Unscreenshottables. Those things that improve the innards of the whole system, but you can’t really show off.
But first! A screenshot of something (to prove that my renderer can display more than just chairs):
One goal of this whole thing is that absolutely NO game logic will exist within the main EXE. It will all be loaded from script files (and eventually managed code assemblies).
I’ve gotten that up and running. The “scripting language” that I’m using is, in fact, C#. Basically, a script is an entity in the world, or an event, or any number of other things. They all derive from the IScript interface, which really requires three functions be implemented: OnCreate, OnTick, and OnKill.
I’ve exposed certain things to the scripting, like the math functions (vectors, matrices, quaternions), Camera control, texture/model loading, etc. There’s no direct access to the renderer, it’s all through the world data. You add objects into the world (which is setup by the main script), and it handles the rest.
I’m trying to make it as simple as possible.
Here is a sample script (for the rotating chairs that you have seen in videos past):
usingSystem;usingCubic.Scripting;usingCubic.Math;classRotatingObject:IScript{IGameRenderable renderable;float angle;float rotSpeed;Vec3 position;staticRandom ran =newSystem.Random(190329);IScriptHelper helper;constfloat objectRange =400.0f;publicRotatingObject(){}publicvoidOnCreate(IScriptHelper helper){this.helper = helper;string[] filenames =newstring[]{"ChairModel.xml","ChairModel2.xml","ChairModel3.xml","ChairModel4.xml",};// Randomly pick a filename from the liststring filename = filenames[ran.Next(filenames.Length)];
angle =0;// Choose a rotation speed
rotSpeed =((float)ran.NextDouble())*0.006f+0.002f;if((ran.Next()&1)==0)
rotSpeed =-rotSpeed;// Random position in a cube
position =newVec3(((float)ran.NextDouble()* objectRange)- objectRange*0.5f,((float)ran.NextDouble()* objectRange)- objectRange*0.5f,((float)ran.NextDouble()* objectRange)- objectRange*0.5f);// Load the file (the true means to load synchronously, instead of caching the load for later)
renderable = helper.CreateRenderable(filename,true);
renderable.Position = Matrix.Translation(position);// Add it to the world (static update - which means it can move in place as long as// the bounding volume is sized big enough to cover the object's entire range of// motion
helper.AddToWorld(renderable, ObjectUpdateType.Static);}publicvoidOnTick(){// Rotate, and update the position matrix.
angle -= rotSpeed *5.0f*3.0f;
renderable.Position = Matrix.RotationAxis(Vec3.Normalize(newVec3(1,1,0)), angle)* Matrix.Translation(position);}publicvoidOnKill(){
helper.RemoveFromWorld(renderable);}}
All-in-all, not terribly complex. It doesn’t have to deal with the renderer, or any major craziness. It just loads its object, adds it to the world, and goes about its thing.
There’s also a main script, which handles the initialization of the entire system (its filename is hardcoded into the exe – it is really about the only hardcoded thing in the system). Also, type scripts: these are scripts which are used as references by the other scripts, so the scripter can define custom types that can be used throughout the system.
There is currently no sound or network code, but graphics and input are working (well enough for now, anyway).
I still need to add actual mouse pointer support (instead of just mouse deltas), and I want to set up a menuing system, and then I’m going to work on scripting a little card game (which I will, sadly, not be able to distribute because it will be based off of an actual for-sale game, in this case Cheapass Games’ Cube Farm).
It should prove a nice little test of a simple game.
Also, I’ve been working on text and UI display, some elements of which I have working:
Yes, that screenshot is back to all-chairs. Chairs are a classic!
They suck. Our power was out for 9 days. For someone as hopelessly addicted to the Internet as I, it was like not having legs. Legs that could span the globe in an instant. Or at least under a few seconds.
The power came back on, predictably, about 2 hours after we had left for the airport to go home to Indianapolis for the holidays.
Thus, the tally of weird things that have happened in the 6 months since I’ve moved to Seattle area and started work at Microsoft is:
My car (Which already had $3800 in hail damage) has been involved in 3 accidents, 2 of which were definitely not my fault and the third of which I can make a pretty good case for
Approached by a guy with a knife near Pike Place Market. He didn’t threaten me with it, he just wanted to sell it to me for $5.
Almost punched by an angry chauffeur in a stupid-looking suit at the Sea-Tac airport because I had the absolute audacity to try to help him out and tell him that the name on his little sign wasn’t visible.
There have been floods and even a (mild, for Indiana) snow storm
9-day power outage
Life: Always entertaining.
(Breakdown of Mop of Destiny’s development after the fold)
Mop of Destiny: Last Words on Code Development
For the three (at most) of you that’s actually been waiting for the remainder of the info on Mop’s development history:
After getting the gameplay test done, I got around to actually loading level data. I ended up using TinyXML to load level data from an XML file.
Side note: Initially, each level was going to have a separate XML file, but that kinda got scrapped somewhere along the line. That’s why there’s 1 xml file named level1.xml in the game directory.
After that, I added fonts. I used a 3D modeler to make a 2D poly set of font characters, and then wrote a font loader to load them in and separate them out.
Essentially, the font interface allows you to request a string, where it then builds a vertex/index buffer set (a mesh) and hands that back. Simple and easy. And still no textures.
After that, it was adding animation code (simple: just different meshes for different frames of animation), the life meter (using a custom vertex shader to bend the meter partially around a circle), enemies, the knockback from getting hit, mesh-based instead of bounding-box-based collision, post process effects, ogg streaming, and spawners and enemy types.
At this point, I made a decision that would drastically alter my timetable, though I didn’t know it at the time:
I decided to make the enemy artwork while making the enemies.
The trick to this is that, in my initial plan, enemies were going to be coded as just boxes and the art would be added later. Not long into this process, I realized that having boxes was a terrible representation of the enemy, so I started doing the art, as well.
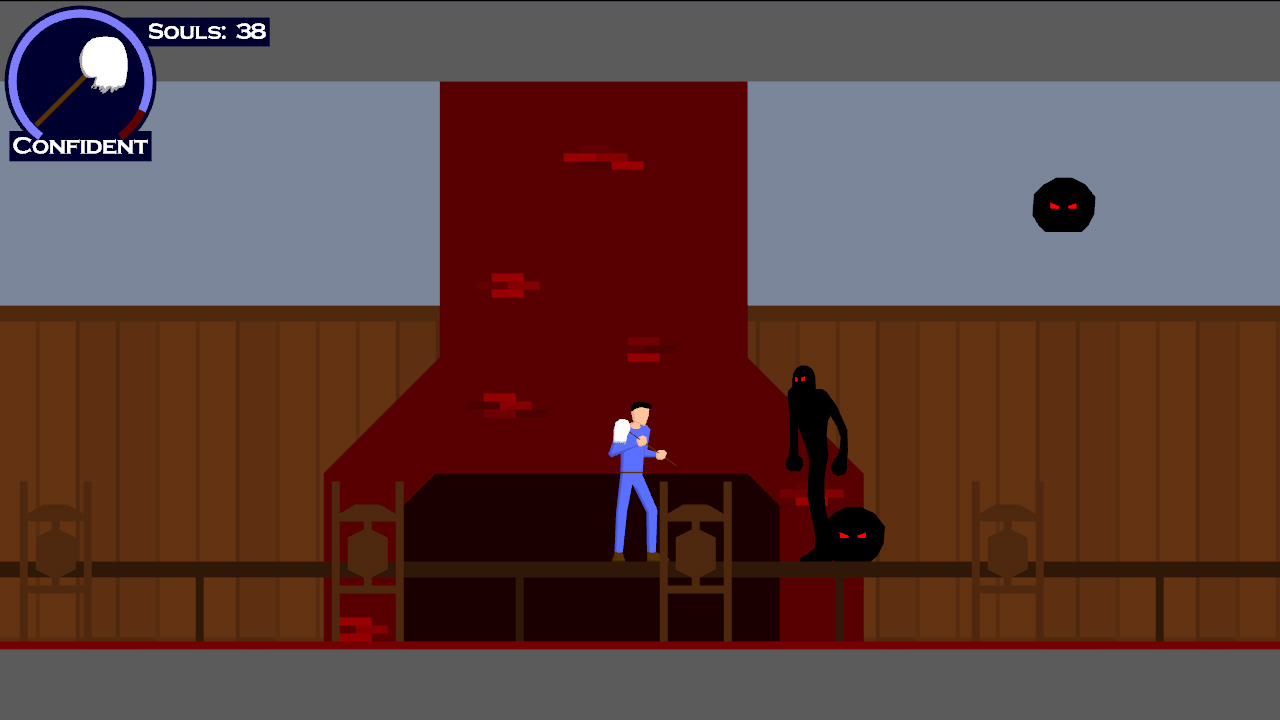
The enemy art was the second-hardest art-making process in the game (first being creating the main character). I had chosen shadow creatures partly to hide my own general inability to draw very well…with shadows I could simply draw an outline and some red eyes. However, it quickly became apparent that it was hard to create any INTERESTING shapes out of just outlines and red eyes.
Thankfully, I was able to do so. While I tried to keep to my inital development timeline, I didn’t really notice that I had moved alot of the art process into the “coding” block of schedule. Which meant that the schedule once I hit the “Art” portion was considerably lighter. Though I didn’t know it at the time.
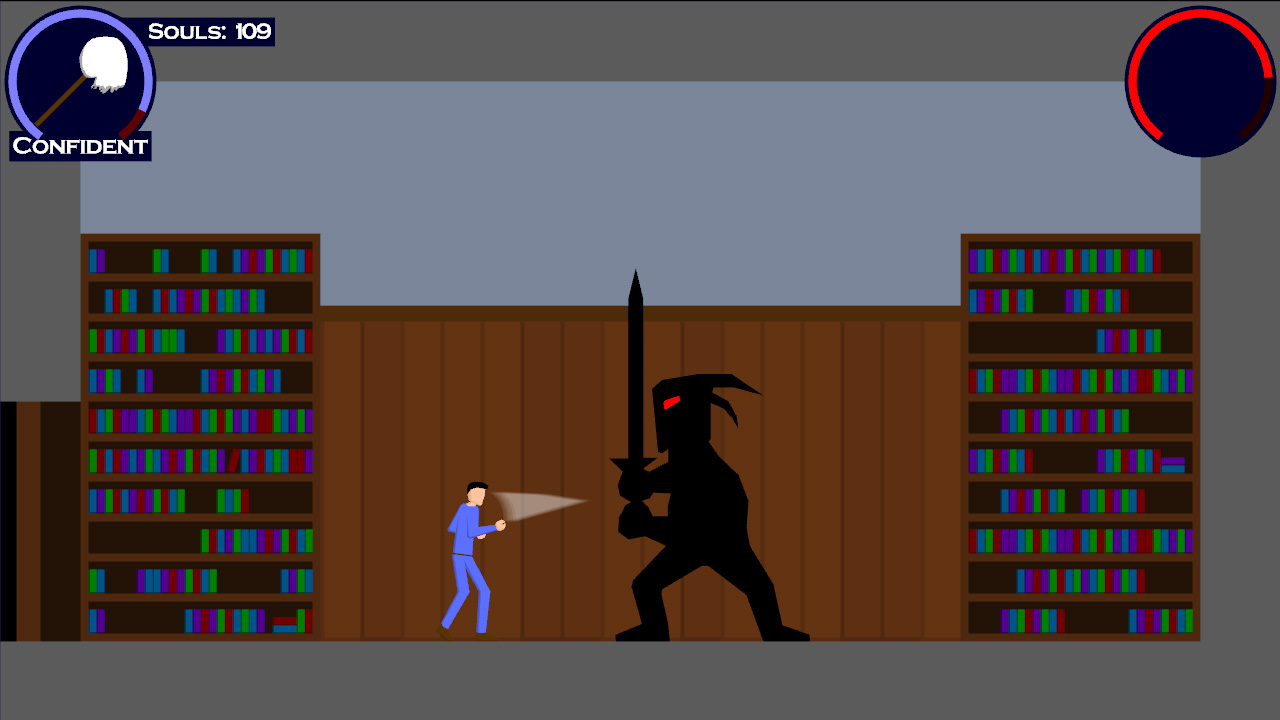
Extra, Extra! Gameplay Complete! Game Still Ugly!
At last, I finished coding the bosses (which were the last enemies to be coded) and had the levels laid out (using solid blocks as backgrounds). The enemies looked cool, but the game looked ugly. A before-and-after, if you will:
(sadly the “before” image is lost to time due to I accidentally linked to my now-defunct gamedev.net journal instead of copying it over)
So I sent it out to a bunch of playtesters, none of which were particularly enthused about the game because of its inherent blockiness. Oh well. One person (thank you, PfhorSlayer!) played through the entire game, as punishing as it was at the time (you think it’s hard NOW? You should have seen it then).
Anyway, I did a bunch of tweaks, and started on the background art. That pretty much catches up to the journal-at-present.
From that point on, it was art, scripting, music, sound effects, voice, credits, the manual, some bug fixes, the installer, and a last-minute save state feature addition. All in the span of 14 days. It was, as they say, a whirlwind.
I’m really happy with the music. Excluding the first 2 pieces (Piano of Destiny and Theme of Destiny), which I spent a few days on (Because I had the melody in my head for so long, and I wanted to do it justice), the remaining music was done in two day’s time.
I used FL Studio as my editor of choice, using a bunch of sample libraries, notably Vienna Instruments.
Anyway, I plan on doing a full-on post-mortem as my next journal post.
Scripting’s done. And I use the term “Scripting” lightly.
All “scripts” are hard-coded into the game. For instance, a sample short script would look like the following:
Add(newStopMusicPoint(m_audio));// Whistler fades in.Add(newCreateEntityPoint(this, m_audio, m_renderer, m_world,"Whistler","Whistler",Vec2(14,1)));Add(newLerpEntityVarPoint(this,"Whistler","alpha",0,0.5f,50));Add(newDialogPoint(m_audio, m_renderer,0xFF7FFF7F,20,"Sound\\3-1.ogg"," 'Nuther seal down, Jack? Good for you! Man, you're sweatin' like a pig...you look like you could use a towel."));Add(newDialogPoint(m_audio, m_renderer,0xFF7F7FFF,20,"Sound\\3-2.ogg"," Silly me for leaving home without it. Arthur Dent would be so disappointed."));Add(newDialogPoint(m_audio, m_renderer,0xFF7FFF7F,20,"Sound\\3-3.ogg"," Who?"));Add(newDialogPoint(m_audio, m_renderer,0xFF7F7FFF,20,"Sound\\3-4.ogg"," Just a...nevermind."));SkipTo();
Basically, that creates an entity named “Whistler” given the entity type “Whistler”, lerps its alpha value from 0 to 0.5, plays a bunch of dialog (the dialog point both plays the ogg dialog sound file and displays the text), then ends.
The SkipTo lets the script know that this is the point that it skips to when the user skips a cutscene. I’m not using it to make unskippable sections, it’s just a quick hack because I’m also using scripts to set up the background music at the beginning of each music zone, so I don’t want the player to be able to skip THAT.
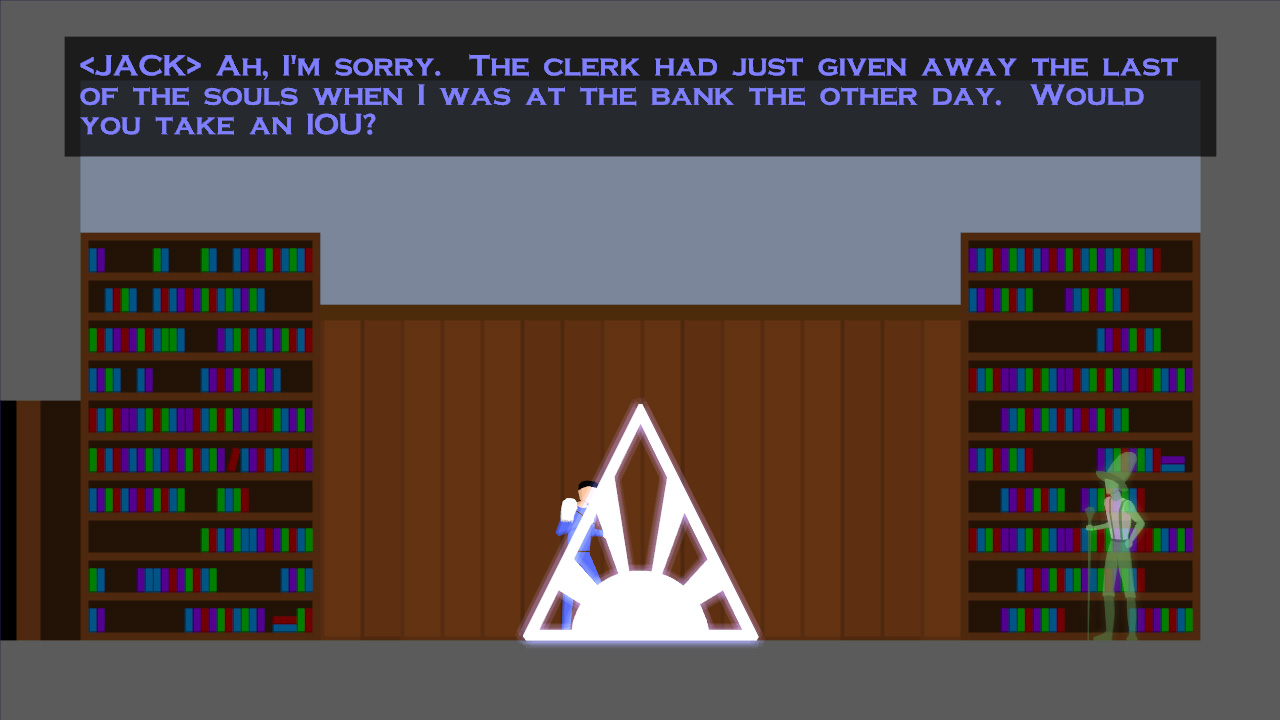
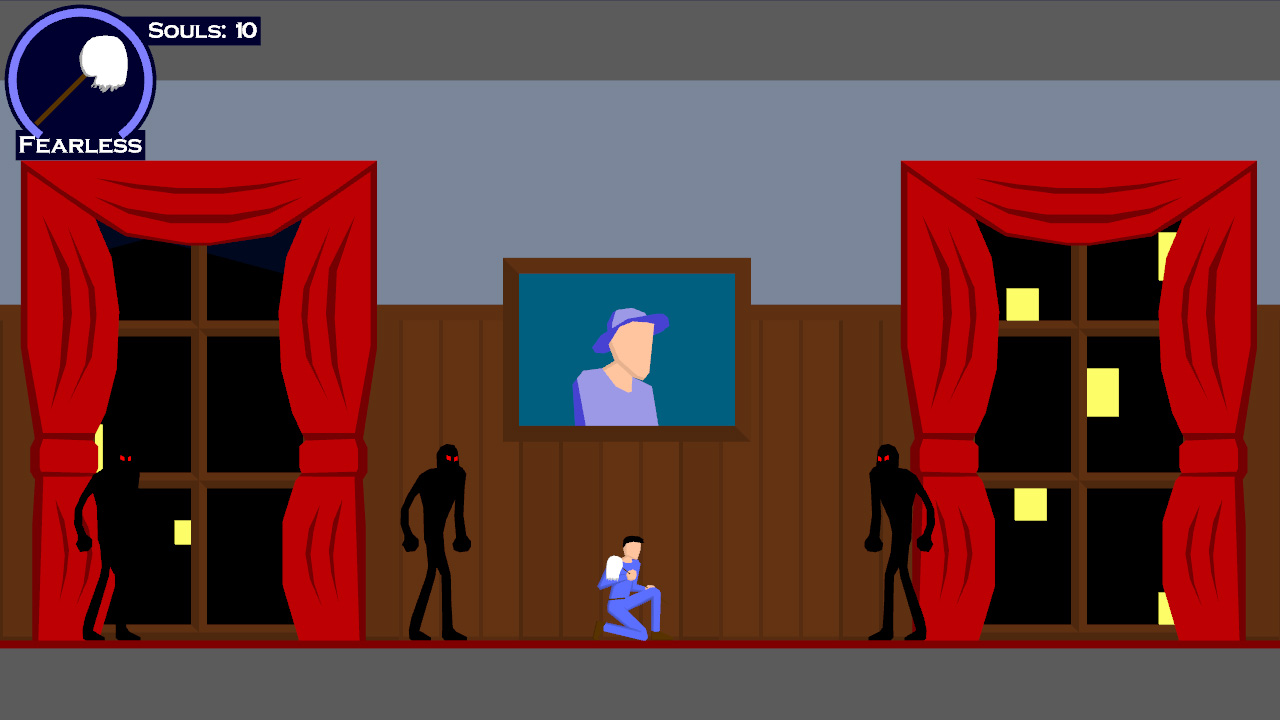
Anyway, a couple of screenshots to tide you over. The first shows a script that’s running (along with the shopkeeper, Whistler P. Higgins), and the second shows the game running in wireframe (That’s right, I’m not using textures! For anything!)
Anyway, I hope to finish up the history details in an entry soon…I haven’t had much time to do so!
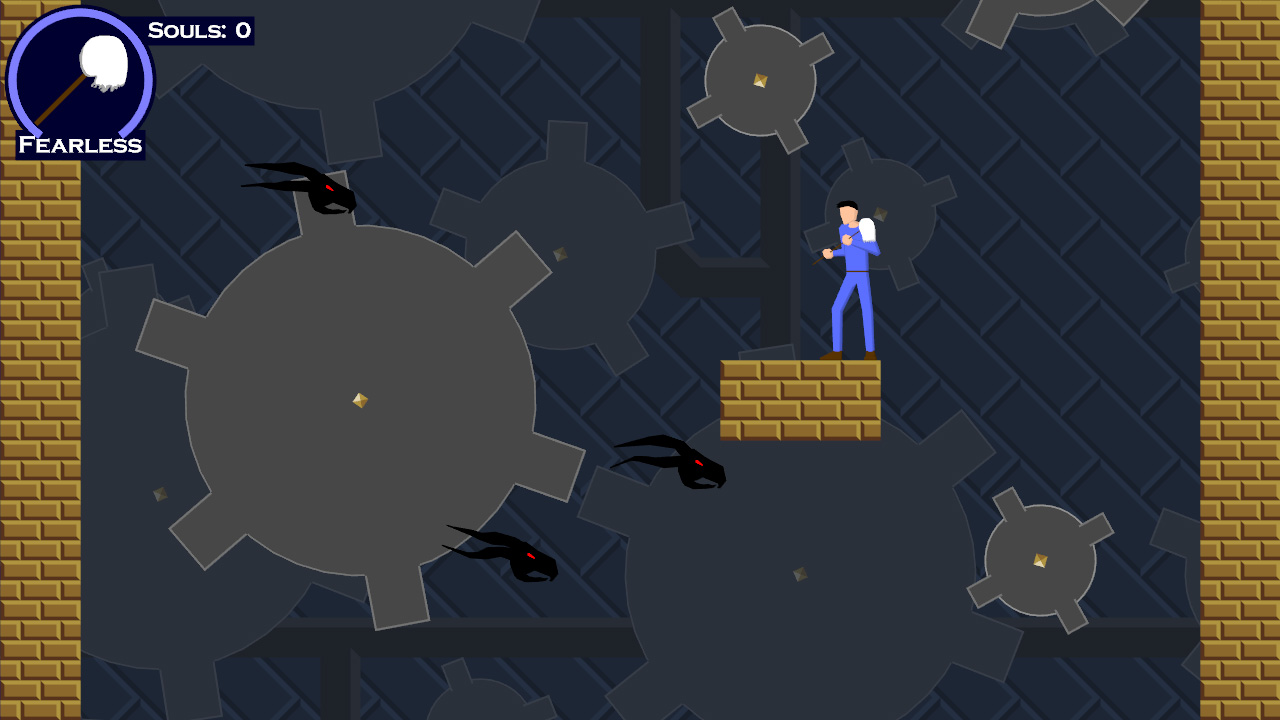
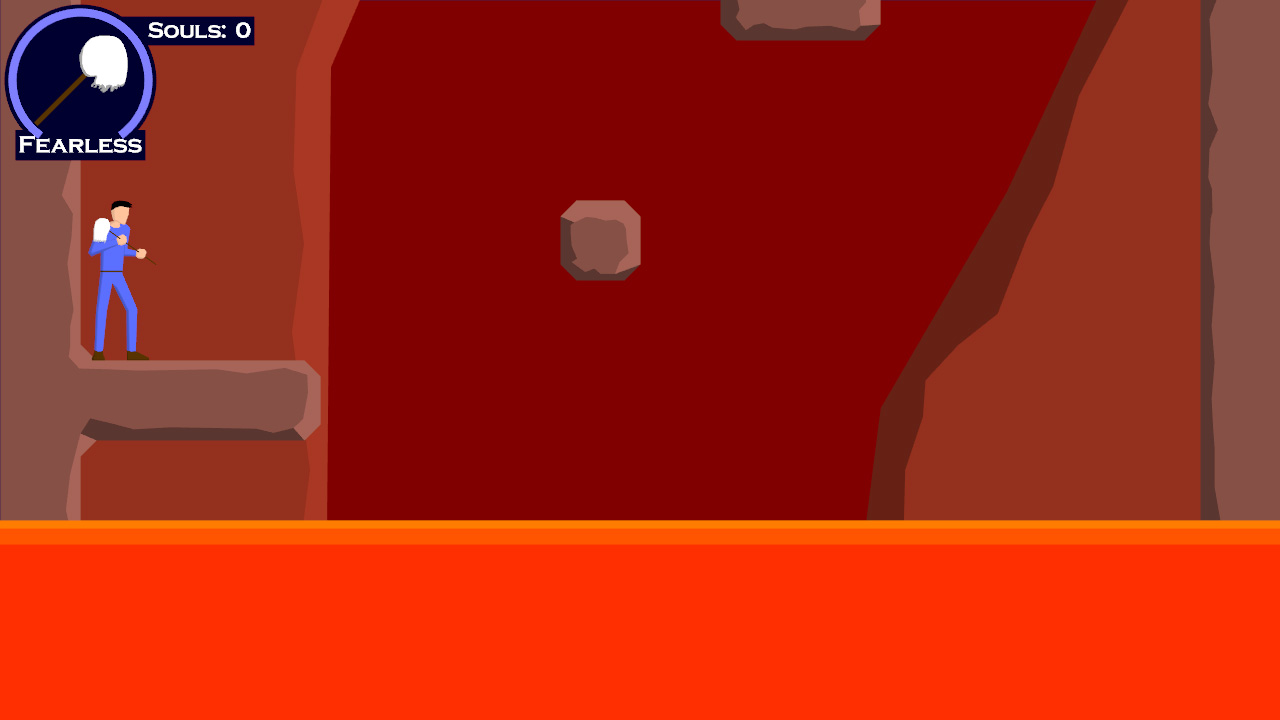
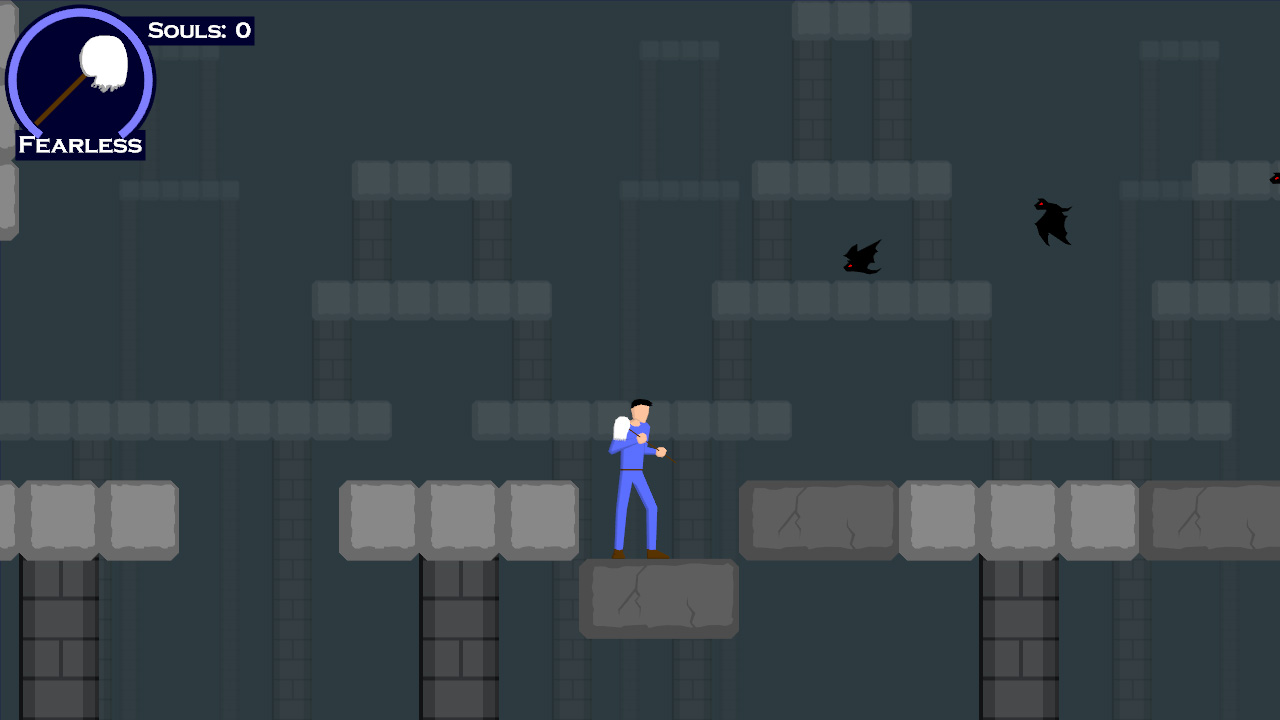
Didn’t quite finish level 3 last night, I got fed up of drawing all of the bevel borders on the rock platforms (it’s all hand-done). Finished it up this afternoon. Moving directly on to level 4.
Again, not much energy to say stuff. I remember what sleep was like. I remember it fondly.
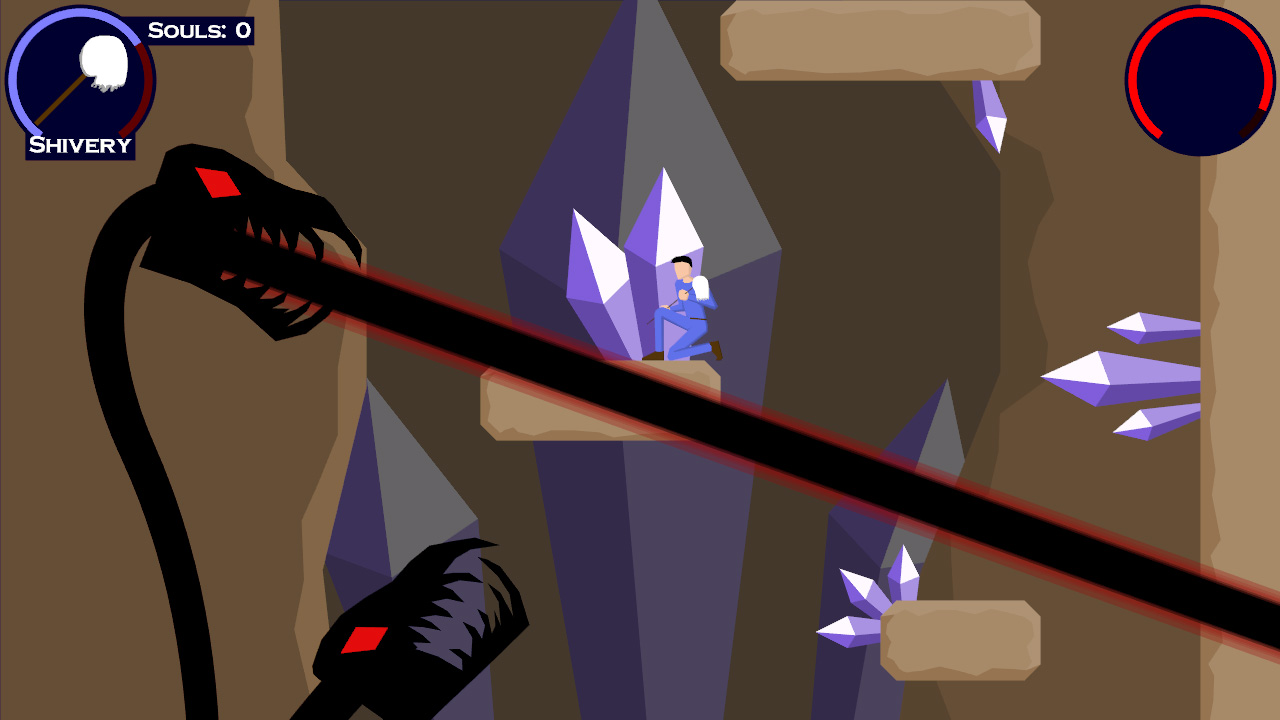
Level 2 is not quite as varied in appearance as level 1 – it’s a bit narrower in focus.
Here are a couple screenshots. Jack’s standing on a falling block in the second shot.
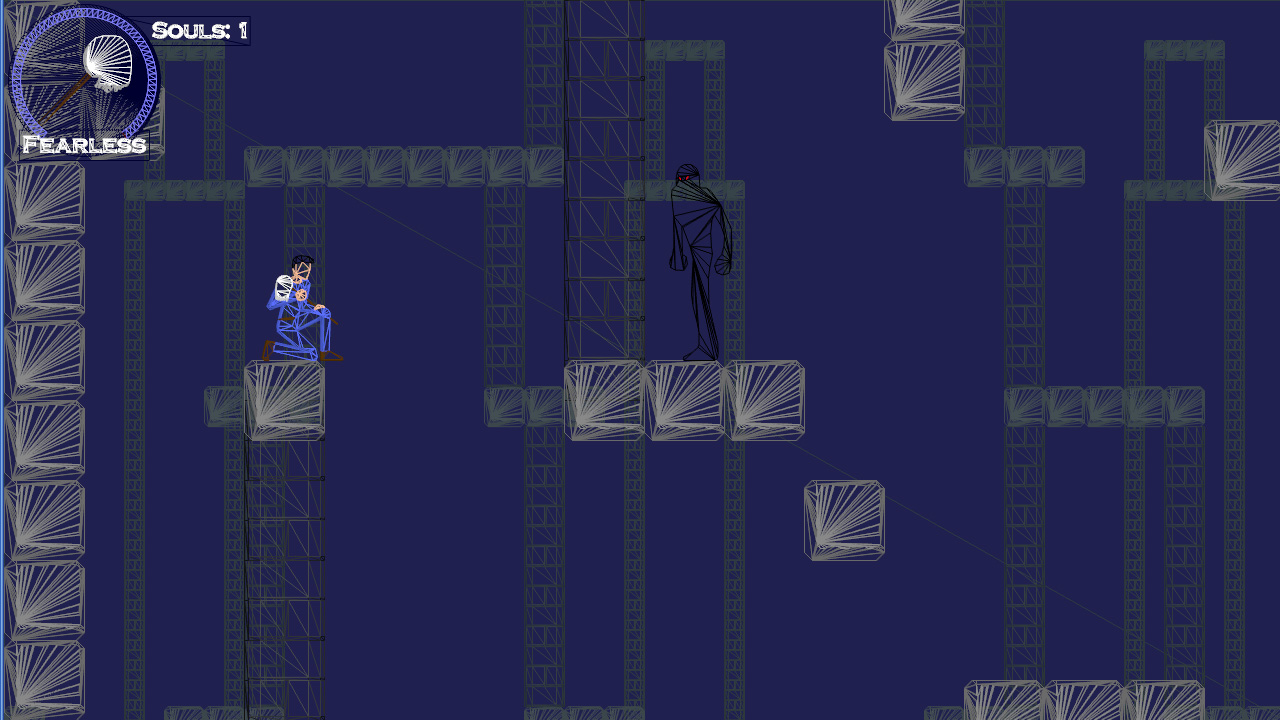
Side note: Keep in mind, when viewing these screenshots that I have a strict “NO TEXTURES” policy. Every detail is a polygon. The idea was to have total resolution independence. There are a lot of polys in my little 2D sidescroller. …In retrospect however, maybe I should have just had textures.
Level 3 tomorrow! I hope to have the background art done by the end of the weekend.
…then all I have left is the cutscenes/music/sound. It’s a bit of an uphill battle to finish, but sometimes those are the most fun battles.
15 days left. The gameplay is done and in “test” (a bunch of friends are playing through it). Thus, I had that terrifying moment where you send out your creation to the world and hope that it works.
…then someone reports that there’s a serious bug which you quickly fix.
That’s how it goes.
And now, TO THE WAYBACK MACHINE!
The Gameplay Prototype
So when last we spoke, I had set my schedule. I had just a few short weeks to get a complete gameplay prototype running. So I started where every game developer seems to start: With the graphics.
I mentioned before that the graphics were simple. Polygonal, no textures. Writing that took about a day (very, very simple code). I checked it in on August 12th.
Next up: Input. No sense in gameplay if you can’t PLAY it. I took the input code that I wrote for my old NES emulator and modified it slightly for my new uses. That gave me automatic keyboard/joystick control.
Side note: Never initialize DirectInput after initializing Direct3D, because it does bad, bad things to the window interface. DirectInput subclasses the window, which Direct3D doesn’t like, so D3D doesn’t like to restore the state of the window correctly after doing a Reset (i.e. for switching between fullscreen/windowed).
Blah blah blah, wrote a bunch of stuff, got the gameplay test done. Only a few days behind schedule, on September 4th.
A Note on the Art Path
So, my original “art path,” as it were, was amazingly complex.
It kinda went like this:
Create object in AutoCAD.
Export from AutoCAD to .3ds
Use a 3D modeling package to import the .3ds
Manually fix up the incorrectly exported colors
Export to .ase
Run custom converter from .ase (an easily parseable ASCII file format) to my own mesh format.
Profit!
This eight-hojillion step process was a pain and, moreover, had one fatal flaw in it.
Check out step number 3. AutoCAD was incorrectly exporting the object colors.
As it turns out, AutoCAD has the ability to set truecolor values to objects, but it also has a built-in 256 color palette (likely left over from the olden days). Now, when ACAD would export, instead of exporting my delicious true colors, it would export the nearest match in the color palette. Consequently, I had to fix them up later.
This became a problem when I tried to do my first test background – Fixing up all of the colors was way too time-consuming, so I had to find a better way.
FIRST I tried to import the DXF directly into the 3D modeler. However, it ALSO screwed up the import. SECOND I tried to write my own DXF reader. As it turns out, the object that I’m using as my building block (the REGION) is one of the only TWO types of ACAD object that are encrypted in the DXF. Which is stupid. THIRD I found a third-party program to convert REGIONs into PolyLines, which I WOULD be able to read. However, this program also dropped the same color information I was trying to preserve, thus ensuring that every last person in the universe has screwed up the color import/export with ACAD files.
The Solution!
I found out that AutoCAD has its own API for writing plugins called ObjectARX. Essentially, I downloaded it and wrote an export function from AutoCAD directly into my mesh format. It does the following things: Scan the scene for regions, and for each region it finds, triangulate it (using ear clipping) then write that to the file.
So now, my art path has become:
Create object in AutoCAD
Export directly to my mesh format, with correct colors intact.
Much better.
MEDIA!!!
I don’t have any new screenshots. What I *DO* have are two of the songs from the game.
The first one is the song that will play during the main menu on game startup. It’s the piano version of the main theme.
Piano of Destiny
The second is the first-level music, which IS the main theme (thus, both songs have the same melody).
Theme of Destiny
Anyway, it’s amazingly late and I work tomorrow, so that’s all I have time for today. Backgrounds truly begin tomorrow!