D3D10 + Deferred Shading = MSAA!

For the last few days I’ve been working at learning D3D10 and using it to whip up a quick prototype of doing fully-deferred shading while using MSAA (multisample antialiasing). If you’re not sure what deferred shading is, but are curious, check out the deferred shading paper at NVIDIA’s developer site. Here are my notes on the experience.

On D3D10

D3D10 is very, very well-designed. It has some interesting new bits of functionality, but the way that the API has been rearranged is really quite nice, though it does tend to produce MUCH more verbose code.

One thing in particular that is very different is the buffer structure. rather than creating a buffer of a specific type (IDirectDrawVertexBuffer9, etc), you simply create a generic buffer (ID3D10Buffer). When you create a buffer, you specify the flags with which it can be bound (as a vertex buffer, index buffer, render target, constant buffer [another new feature], etc).

For instance, here’s my helper function to create a vertex buffer:

HRESULT CreateVertexBuffer(void *initialData, DWORD size, ID3D10Buffer** vb)
{
  D3D10_BUFFER_DESC bd;
  bd.Usage = D3D10_USAGE_IMMUTABLE; //  This tells it that the buffer will be filled with data on initialization and never updated again.
  bd.ByteWidth = size;
  bd.BindFlags = D3D10_BIND_VERTEX_BUFFER; // This tells it that it will be used as a vertex buffer
  bd.CPUAccessFlags = 0;
  bd.MiscFlags = 0;

  // Pass the pointer to the vertex data into the creation
  D3D10_SUBRESOURCE_DATA vInit;
  vInit.pSysMem = initialData;

  return g_device->CreateBuffer( &bd, &vInit, vb);
}

It’s pretty straightforward, but you can see that it’s a tad more verbose than a single-line call to IDirect3DDevice9::CreateVertexBuffer.

Another thing that I really like is the whole constant buffer idea. Basically, when passing state to shaders, rather than setting individual shader states, you build constant buffers, which you apply to constant buffer slots (15 buffer slots that can hold 4096 constants each – which adds up to a crapton of constants). So you can have different constant blocks that you can Map/Unmap (the D3D10 version of Lock/Unlock) to write data into, and you can update them based on frequency. For instance, I plan to have a cblocks that are per-world, per-frame, per-material, and per-object.

But the feature that’s most relevant to this project is this little gem:
You can read individual samples from a multisample render target.
This is what allows you to do deferred shading with true multisample anti-aliasing in D3D10.

The only thing that really, really sucks about D3D10 is the documentation. It is missing a lot of critical information, some of the function definitions are wrong, sample code has incorrect variable names, etc, etc. It’s good at giving a decent overview, but when you start to drill into specifics, there’s still a lot of work to be done.

SV_Position: What Is It Good For (Absolutely Lots!)

SV_Position is the D3D10 equivalent of the POSITION semantic: it’s what you write out of your vertex shader to set the vertex position.

However, you can also use it in a pixel shader. But what set of values does it contain when it reaches the pixel shader? The documentation was (unsurprisingly) not helpful in determining this.

Quite simply, it gives you viewport coordinates. That is, x and y will give you the absolute coordinates of the current texel you’re rendering in the framebuffer (if your framebuffer is 640×480, then a SV_Position.xy in the middle would be (320×240)).

The Z coordinate is a viewport Z coordinate (if your viewport’s MinZ is 0.5 and your MaxZ is 1, then this z coordinate will be confined to that range as well).

The W coordinate I’m less sure about – it seemed to be the (interpolated) w value from the vertex shader, but I’m not positive on that.

I thought this viewport-coordinate thing was a tad odd…I mean, who cares which absolute pixel you’re at on the view? Why not just give me a [0..1] range? As it turns out, when sampling multisample buffers, you actually DO care, because you don’t “sample” them. You “load” them.

Doing a texture Load does not work quite like doing a texture Sample. Load takes integer coordinates that correspond to the absolute pixel value to read. Load is also the only way to grab a specific sample out of the pack.

But, in conjunction with our delicious SV_Position absolute-in-the-render-target coordinates, you have exactly the right information!

Pulling a given sample out of the depth texture is as easy as:

int sample; // this contains the index of the sample to load.  If this is a 4xAA texture, then sample is in the range [0, 3].
VertexInput i; // i.position is the input SV_Position.  It contains the absolute pixel coordinates of the current render.
texture2DMS<float, NUMSAMPLES> depthTexture; // This is the depth texture - it's a 2D multi-sample texture, defined as
                                             // having a single float, and having NUMSAMPLES samples

// Here's the actual line of sampling code
float  depth   = depthTexture.Load(int3((int2)i.position.xy, 0), sample).x;

Simple! I do believe it is for exactly this type of scenario (using Load to do postprocess work) that SV_Position in the PS was designed the way it is. Another mystery of the universe solved. Next on the list: “What makes creaking doors so creepy?”

Workin’ It

Simply running the deferred algorithm for each sample in the deferred GBuffers’ current texel and averaging them together works just fine. That gets you the effect with a minimum of hassle. But I felt that it could be optimized a bit.

The three deferred render targets that get used in this demo are the unlit diffuse color buffer (standard A8R8G8B8), the depth render (R32F), and the normal map buffer (A2R10G10B10). The depth render is not necessary in D3D10 when there is no multisampling, because you can read from a non-ms depth buffer in D3D10. However, you can’t map a multisampled depth buffer as a texture, so I have to render depth on my own.

Anyway, I wanted to have a flag that denoted whether or not a given location’s samples were different or not. That is, if it’s along a poly edge, the samples are probably different. But, due to the nature of multisampling, if a texel is entirely within a polygon’s border, all of the samples will contain the same data. There is really no need to do deferred lighting calculations on MULTIPLE samples when one would do just fine. So I added a pass that runs through each pixel and tests the color and depth samples for differences. If there ARE differences, it writes a 1 to the previously-useless 2-bit alpha channel in the normal map buffer. Otherwise, it writes a 0.

What this does, is allows me to selectively decide whether to do the processing on multiple samples (normalMap.w == 1) or just a single one (normalMap.w == 0).

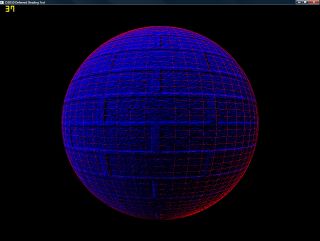
Here is a visualization:


Click to enlarge

I’ve tinted it red where extra work is done (the shading is done per-sample) and blue where shading is only done once.

This didn’t have the massive performance boost that I was expecting – I figured having a single pass through almost all samples then only loading them as-needed would save massive amounts of texture bandwidth during the lighting phase, as well as cutting down on the processing.

I was half-right.

In fact, the performance boost was much smaller than expected. The reason is, I’ve guessed, is that when caching the multisample texture, it caches all of the samples (because it’s likely that they’ll all be read under normal circumstances), so it really doesn’t cut down on the memory bandwidth at all. What it DOES cut down on is the processing which, as the lighting gets more complex (shadowing is added, etc), WILL become important. Also, since my shader is set up to be able to do up to 8 lights in a single pass, It renders 25 full-scene directional lights (in…4 passes) at about 70fps with 4xAA at 1280×964 (maximized window, so not the whole screen) on my 8800GTX. As a comparison, it’s about 160 fps without the AA.

With a more reasonable 4 lights (single-pass) it’s 160fps at that resolution with AA, and 550 without. Not bad at all!

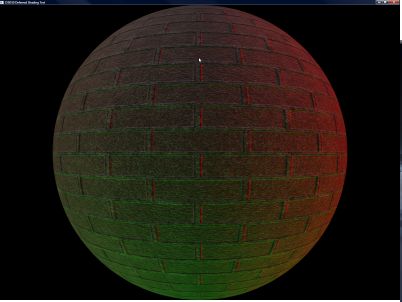
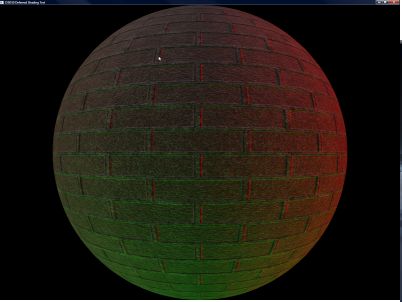
Here are two screenshots, one with AA, one without (respectively). Note that they look exactly the same in thumbnails. I could have probably used the same thumbnail for them, but whatever 🙂


Click to enlarge

And here it is!

Crappy D3D10 Deferred-with-AA demo (with hideous, hideous source!)

Pressing F5 will toggle the AA on and off (it just uses 4xAA). It defaults to off.
The Topics Grew In Fields

A few things to talk about this entry (no screenshots, but there is an MP3 later):

Cube Farm

Cube farm is declared complete. I decided not to add any polish to it, because it was simply a test of my game development framework. It gave me a large list of things that I need to work on (better UI layout control, ability to put 3D objects into the UI, menuing systems, better input setup, etc) before moving on to the next game. Which brings us to…

Next Project

In keeping with my Konami-inspired game development theme, the next game that I’m planning will be a side-scrolling space shoot-em-up similar to Gradius.

The plan, however, is to have all of the entities and backgrounds be full 3D and make use of some of the higher-level features of my framework (some of which are actually implemented). These features include (but are not limited to):

  • Procedurally-generated textures (on-the-fly, cached in, no tiling)
  • instancing
  • Multi-core support
  • Procedural geometry

New Song

I was finally able to break through my composer’s block and get something (ANYTHING!) composed. I like it, though it’s a bit longer than it needs to be. Oh well, that I got anything written at all is good enough right now. I’ve been on a dry streak since the end of Mop of Destiny.

MP3: Longing – 4:31 (6.5 MB)

No Cows In the Cube Farm

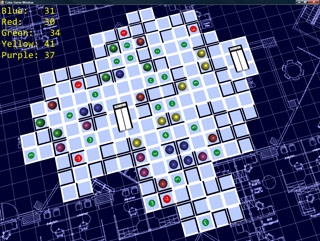
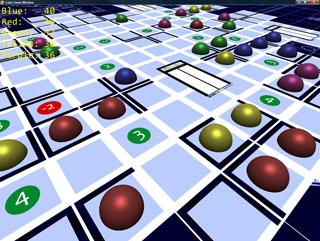
Well, I finally have all of the gameplay working. It supports 2-5 players, and is quite enjoyable.

I need to add a, you know…menu, stuff like that. Also, I would love for it to play networked, since it does kinda require the cards in one’s hand be a secret to the other players.

But, the gameplay logic is all done, the last of the (known) bugs is squashed, and it’s time to go play Super Paper Mario!

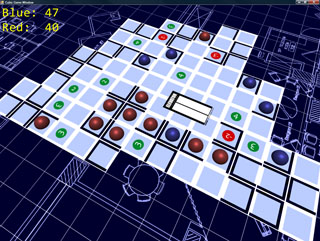
BEHOLD MY RIDICULOUSLY UGLY SPECULAR GAME PIECES!


Click to enlarge

Chairless in Seattle

Cube Farm is coming along nicely – half of the gameplay is done.

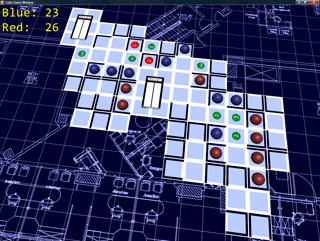
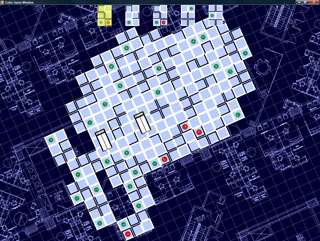
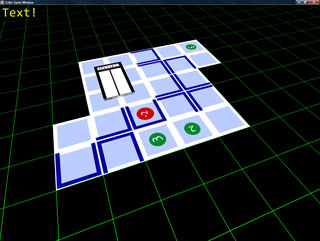
In the game, for every turn, you place one card, and fill one cubicle (if possible). I have the card-placing portion done.

It involves filling in holes that are too small for a card to fit in as walkable floor space (for the purposes of determining if workers can reach the elevator). Any hole that has room for a card must remain open.

So now there’s a hand of cards to choose from, and you can select one and place it in a legal spot. Also done (though not visible), the code to determine which areas can reach the elevator and to determine how many points a given cubicle is worth is also in. Next up: worker placement!


Click to enlarge

More to do, more to do!

OMG WAI NO CHAIRS

The first test of my scripting setup is going rather well. And it’s completely chairless.

I have been working on converting over Cheapass Games’ “Cube Farm” into a digital format (which, sad to say, I’m never going to give out to anyone, what with copyright issues and the like. This is just my own internal test to make sure that I can do it), and it’s going rather well.

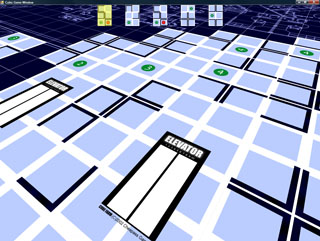
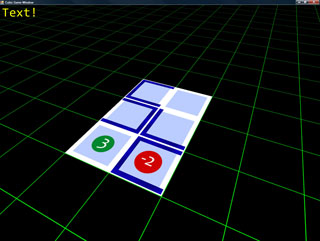
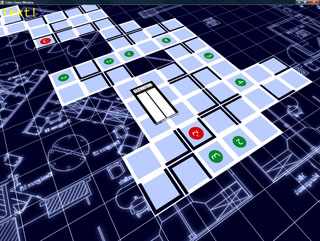
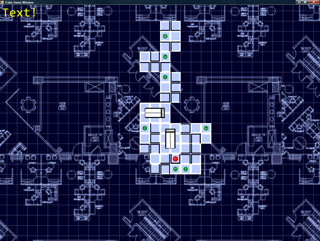
While I don’t have any of the scoring working yet, what I *DO* have is very promising. Namely, I have the cards displaying, and you can place them in the world.

Also, I recently added a blueprint-style background which, while it’s a bit higher contrast than I’d like, is a bit more interesting (and fitting) than the original green-on-black grid.

Some screenshots!


Click to enlarge

The camera control is simple (and intuitive): hold down the right mouse button, and you can drag the grid around (to move the camera). Holding middle mouse lets you move the mouse left/right to spin the camera around the look-at point, and up/down zooms in and out (and also adjust the angle at which you’re viewing the board).

So far, so good. Next up: Actual gameplay!

Crazy!

Do Androids Dream of Electric Chairs?

So, I’ve been working on the Intangibles. Otherwise known as the Unscreenshottables. Those things that improve the innards of the whole system, but you can’t really show off.

But first! A screenshot of something (to prove that my renderer can display more than just chairs):


Click to enlarge

One goal of this whole thing is that absolutely NO game logic will exist within the main EXE. It will all be loaded from script files (and eventually managed code assemblies).

I’ve gotten that up and running. The “scripting language” that I’m using is, in fact, C#. Basically, a script is an entity in the world, or an event, or any number of other things. They all derive from the IScript interface, which really requires three functions be implemented: OnCreate, OnTick, and OnKill.

I’ve exposed certain things to the scripting, like the math functions (vectors, matrices, quaternions), Camera control, texture/model loading, etc. There’s no direct access to the renderer, it’s all through the world data. You add objects into the world (which is setup by the main script), and it handles the rest.

I’m trying to make it as simple as possible.

Here is a sample script (for the rotating chairs that you have seen in videos past):

using System;
using Cubic.Scripting;
using Cubic.Math;

class RotatingObject : IScript
{
  IGameRenderable renderable;

  float angle;
  float rotSpeed;
  Vec3 position;
  static Random ran = new System.Random(190329);
  IScriptHelper helper;
  const float objectRange = 400.0f;

  public RotatingObject()
  {
  }

  public void OnCreate(IScriptHelper helper)
  {
    this.helper = helper;

    string[] filenames = new string[]
    {
      "ChairModel.xml",
      "ChairModel2.xml",
      "ChairModel3.xml",
      "ChairModel4.xml",
    };

    // Randomly pick a filename from the list
    string filename = filenames[ran.Next(filenames.Length)];
    angle = 0;

    // Choose a rotation speed
    rotSpeed = ((float)ran.NextDouble())*0.006f + 0.002f;
    if((ran.Next()&1) == 0)
      rotSpeed = -rotSpeed;

    // Random position in a cube
    position = new Vec3(((float)ran.NextDouble() * objectRange) - objectRange*0.5f,
                        ((float)ran.NextDouble() * objectRange) - objectRange*0.5f,
                        ((float)ran.NextDouble() * objectRange) - objectRange*0.5f);

    // Load the file (the true means to load synchronously, instead of caching the load for later)
    renderable = helper.CreateRenderable(filename, true);
    renderable.Position = Matrix.Translation(position);

    // Add it to the world (static update - which means it can move in place as long as
    // the bounding volume is sized big enough to cover the object's entire range of
    // motion
    helper.AddToWorld(renderable, ObjectUpdateType.Static);
  }

  public void OnTick()
  {
    // Rotate, and update the position matrix.
    angle -= rotSpeed * 5.0f*3.0f;
    renderable.Position = Matrix.RotationAxis(Vec3.Normalize(new Vec3(1, 1, 0)), angle)* Matrix.Translation(position);
  }

  public void OnKill()
  {
    helper.RemoveFromWorld(renderable);
  }
}

All-in-all, not terribly complex. It doesn’t have to deal with the renderer, or any major craziness. It just loads its object, adds it to the world, and goes about its thing.

There’s also a main script, which handles the initialization of the entire system (its filename is hardcoded into the exe – it is really about the only hardcoded thing in the system). Also, type scripts: these are scripts which are used as references by the other scripts, so the scripter can define custom types that can be used throughout the system.

There is currently no sound or network code, but graphics and input are working (well enough for now, anyway).

I still need to add actual mouse pointer support (instead of just mouse deltas), and I want to set up a menuing system, and then I’m going to work on scripting a little card game (which I will, sadly, not be able to distribute because it will be based off of an actual for-sale game, in this case Cheapass Games’ Cube Farm).

It should prove a nice little test of a simple game.

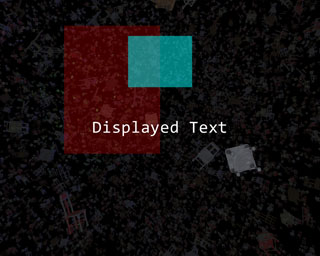
Also, I’ve been working on text and UI display, some elements of which I have working:


Click to enlarge

Yes, that screenshot is back to all-chairs. Chairs are a classic!

But enough talk. HAVE AT YOU!

<end transmission>

One Day, Maybe I’ll Update With Some Regularity

Yeah, this journal does not get updated nearly as frequently as I’d like, but I’ve been working on a new basis for a few new games that I’d like to try and make (one of which is actually my old 3D racing game). In the meantime, I’ve been working on the backend of the whole thing, including the task management system (to take full advantage of multicore systems) and the renderer. Hopefully within a month I’ll be started on the Super Awesome Scripty System (TM) and the Ultra Mega Material Creation Tool (C).

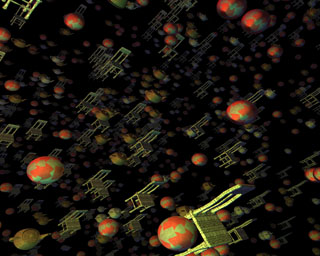
In the meantime, I thought I’d share a screenshot from the stress test of the renderer. It was intended to test the culling system, to see how effective (and fast) it is, and the results are very promising.

It is the stuff of dreams, and the stuff of nightmares.

This….is…..CHAIRTOWN:

Once Upon A Time In Chairtown
Click to enlarge

Anyway, enjoy! Hopefully I’ll have some more interesting screenshots in the near future (though history certainly says otherwise).

Historeez

For those who missed it:

Mop of Destiny Soundtrack MP3s!

On Power Outages (And Other Weird Things)

They suck. Our power was out for 9 days. For someone as hopelessly addicted to the Internet as I, it was like not having legs. Legs that could span the globe in an instant. Or at least under a few seconds.

The power came back on, predictably, about 2 hours after we had left for the airport to go home to Indianapolis for the holidays.

Thus, the tally of weird things that have happened in the 6 months since I’ve moved to Seattle area and started work at Microsoft is:

  • My car (Which already had $3800 in hail damage) has been involved in 3 accidents, 2 of which were definitely not my fault and the third of which I can make a pretty good case for
  • Approached by a guy with a knife near Pike Place Market. He didn’t threaten me with it, he just wanted to sell it to me for $5.
  • Almost punched by an angry chauffeur in a stupid-looking suit at the Sea-Tac airport because I had the absolute audacity to try to help him out and tell him that the name on his little sign wasn’t visible.
  • There have been floods and even a (mild, for Indiana) snow storm
  • 9-day power outage

Life: Always entertaining.

Mop of Destiny: Last Words on Code Development

For the three (at most) of you that’s actually been waiting for the remainder of the info on Mop’s development history:

After getting the gameplay test done, I got around to actually loading level data. I ended up using TinyXML to load level data from an XML file.

Side note: Initially, each level was going to have a separate XML file, but that kinda got scrapped somewhere along the line. That’s why there’s 1 xml file named level1.xml in the game directory.

After that, I added fonts. I used a 3D modeler to make a 2D poly set of font characters, and then wrote a font loader to load them in and separate them out.

Essentially, the font interface allows you to request a string, where it then builds a vertex/index buffer set (a mesh) and hands that back. Simple and easy. And still no textures.

After that, it was adding animation code (simple: just different meshes for different frames of animation), the life meter (using a custom vertex shader to bend the meter partially around a circle), enemies, the knockback from getting hit, mesh-based instead of bounding-box-based collision, post process effects, ogg streaming, and spawners and enemy types.

At this point, I made a decision that would drastically alter my timetable, though I didn’t know it at the time:

I decided to make the enemy artwork while making the enemies.

The trick to this is that, in my initial plan, enemies were going to be coded as just boxes and the art would be added later. Not long into this process, I realized that having boxes was a terrible representation of the enemy, so I started doing the art, as well.

The enemy art was the second-hardest art-making process in the game (first being creating the main character). I had chosen shadow creatures partly to hide my own general inability to draw very well…with shadows I could simply draw an outline and some red eyes. However, it quickly became apparent that it was hard to create any INTERESTING shapes out of just outlines and red eyes.

Thankfully, I was able to do so. While I tried to keep to my inital development timeline, I didn’t really notice that I had moved alot of the art process into the “coding” block of schedule. Which meant that the schedule once I hit the “Art” portion was considerably lighter. Though I didn’t know it at the time.

Extra, Extra! Gameplay Complete! Game Still Ugly!

At last, I finished coding the bosses (which were the last enemies to be coded) and had the levels laid out (using solid blocks as backgrounds). The enemies looked cool, but the game looked ugly. A before-and-after, if you will:


VS

Click to enlarge

So I sent it out to a bunch of playtesters, none of which were particularly enthused about the game because of its inherent blockiness. Oh well. One person (thank you, PfhorSlayer!) played through the entire game, as punishing as it was at the time (you think it’s hard NOW? You should have seen it then).

Anyway, I did a bunch of tweaks, and started on the background art. That pretty much catches up to the journal-at-present.

From that point on, it was art, scripting, music, sound effects, voice, credits, the manual, some bug fixes, the installer, and a last-minute save state feature addition. All in the span of 14 days. It was, as they say, a whirlwind.

I’m really happy with the music. Excluding the first 2 pieces (Piano of Destiny and Theme of Destiny), which I spent a few days on (Because I had the melody in my head for so long, and I wanted to do it justice), the remaining music was done in two day’s time.

I used FL Studio as my editor of choice, using a bunch of sample libraries, notably Vienna Instruments.

Anyway, I plan on doing a full-on post-mortem as my next journal post.

In the meantime, TO THE XBOX 360!

FOR THE LOVE OF GOD POST AN ENTRY!

So I’ve been wanting to post more details about Mop of Destiny‘s development, as well as a full-on postmortem of the game. However, I took a long break from it (I needed it), and when I was getting back into it, I lost power last Thursday in the Great Pacific Northwest Windstorm and Subsequent Ginormous Blackout Of 2006 and have had no power at home since (almost a full week now), so it’s been tricky to do this. I’m typing this on my computer at work.

I still plan on posting that information, but in the mean time, I have a really crappy page set up with soundtrack MP3s from the game, ordered as I would have them if they were on a true soundtrack CD. You can nab them at:

http://mopofdestiny.com/ost/.

Also, there’s an updated EXE of Mop of destiny at http://mopofdestiny.com/MopInstall.exe that fixes an issue with Intel integrated cards that support hardware pixel shaders but not vertex shaders.

Enjoy! I shall return with light, triumphantly. Eventually.

PS – I’m in the planning stages of porting the game to XNA, so that it will eventually be playable on the Xbox 360. Woo!