D3D10 + Deferred Shading = MSAA!
For the last few days I’ve been working at learning D3D10 and using it to whip up a quick prototype of doing fully-deferred shading while using MSAA (multisample antialiasing). If you’re not sure what deferred shading is, but are curious, check out the deferred shading paper at NVIDIA’s developer site. Here are my notes on the experience.
On D3D10
D3D10 is very, very well-designed. It has some interesting new bits of functionality, but the way that the API has been rearranged is really quite nice, though it does tend to produce MUCH more verbose code.
One thing in particular that is very different is the buffer structure. rather than creating a buffer of a specific type (IDirectDrawVertexBuffer9, etc), you simply create a generic buffer (ID3D10Buffer). When you create a buffer, you specify the flags with which it can be bound (as a vertex buffer, index buffer, render target, constant buffer [another new feature], etc).
For instance, here’s my helper function to create a vertex buffer:
HRESULT CreateVertexBuffer(void *initialData, DWORD size, ID3D10Buffer** vb)
{
  D3D10_BUFFER_DESC bd;
  bd.Usage = D3D10_USAGE_IMMUTABLE; //  This tells it that the buffer will be filled with data on initialization and never updated again.
  bd.ByteWidth = size;
  bd.BindFlags = D3D10_BIND_VERTEX_BUFFER; // This tells it that it will be used as a vertex buffer
  bd.CPUAccessFlags = 0;
  bd.MiscFlags = 0;

  // Pass the pointer to the vertex data into the creation
  D3D10_SUBRESOURCE_DATA vInit;
  vInit.pSysMem = initialData;

  return g_device->CreateBuffer( &bd, &vInit, vb);
}
It’s pretty straightforward, but you can see that it’s a tad more verbose than a single-line call to IDirect3DDevice9::CreateVertexBuffer.
Another thing that I really like is the whole constant buffer idea. Basically, when passing state to shaders, rather than setting individual shader states, you build constant buffers, which you apply to constant buffer slots (15 buffer slots that can hold 4096 constants each – which adds up to a crapton of constants). So you can have different constant blocks that you can Map/Unmap (the D3D10 version of Lock/Unlock) to write data into, and you can update them based on frequency. For instance, I plan to have a cblocks that are per-world, per-frame, per-material, and per-object.
But the feature that’s most relevant to this project is this little gem:
You can read individual samples from a multisample render target.
This is what allows you to do deferred shading with true multisample anti-aliasing in D3D10.
The only thing that really, really sucks about D3D10 is the documentation. It is missing a lot of critical information, some of the function definitions are wrong, sample code has incorrect variable names, etc, etc. It’s good at giving a decent overview, but when you start to drill into specifics, there’s still a lot of work to be done.
SV_Position: What Is It Good For (Absolutely Lots!)
SV_Position is the D3D10 equivalent of the POSITION semantic: it’s what you write out of your vertex shader to set the vertex position.
However, you can also use it in a pixel shader. But what set of values does it contain when it reaches the pixel shader? The documentation was (unsurprisingly) not helpful in determining this.
Quite simply, it gives you viewport coordinates. That is, x and y will give you the absolute coordinates of the current texel you’re rendering in the framebuffer (if your framebuffer is 640×480, then a SV_Position.xy in the middle would be (320×240)).
The Z coordinate is a viewport Z coordinate (if your viewport’s MinZ is 0.5 and your MaxZ is 1, then this z coordinate will be confined to that range as well).
The W coordinate I’m less sure about – it seemed to be the (interpolated) w value from the vertex shader, but I’m not positive on that.
I thought this viewport-coordinate thing was a tad odd…I mean, who cares which absolute pixel you’re at on the view? Why not just give me a [0…1] range? As it turns out, when sampling multisample buffers, you actually DO care, because you don’t “sample” them. You “load” them.
Doing a texture Load does not work quite like doing a texture Sample. Load takes integer coordinates that correspond to the absolute pixel value to read. Load is also the only way to grab a specific sample out of the pack.
But, in conjunction with our delicious SV_Position absolute-in-the-render-target coordinates, you have exactly the right information!
Pulling a given sample out of the depth texture is as easy as:
int sample; // this contains the index of the sample to load.  If this is a 4xAA texture, then sample is in the range [0, 3].
VertexInput i; // i.position is the input SV_Position.  It contains the absolute pixel coordinates of the current render.
texture2DMS depthTexture; // This is the depth texture - it's a 2D multi-sample texture, defined as
                                             // having a single float, and having NUMSAMPLES samples

// Here's the actual line of sampling code
float  depth   = depthTexture.Load(int3((int2)i.position.xy, 0), sample).x;
Simple! I do believe it is for exactly this type of scenario (using Load to do postprocess work) that SV_Position in the PS was designed the way it is. Another mystery of the universe solved. Next on the list: “What makes creaking doors so creepy?”
Workin’ It
Simply running the deferred algorithm for each sample in the deferred GBuffers’ current texel and averaging them together works just fine. That gets you the effect with a minimum of hassle. But I felt that it could be optimized a bit.
The three deferred render targets that get used in this demo are the unlit diffuse color buffer (standard A8R8G8B8), the depth render (R32F), and the normal map buffer (A2R10G10B10). The depth render is not necessary in D3D10 when there is no multisampling, because you can read from a non-ms depth buffer in D3D10. However, you can’t map a multisampled depth buffer as a texture, so I have to render depth on my own.
Anyway, I wanted to have a flag that denoted whether or not a given location’s samples were different or not. That is, if it’s along a poly edge, the samples are probably different. But, due to the nature of multisampling, if a texel is entirely within a polygon’s border, all of the samples will contain the same data. There is really no need to do deferred lighting calculations on MULTIPLE samples when one would do just fine. So I added a pass that runs through each pixel and tests the color and depth samples for differences. If there ARE differences, it writes a 1 to the previously-useless 2-bit alpha channel in the normal map buffer. Otherwise, it writes a 0.
What this does, is allows me to selectively decide whether to do the processing on multiple samples (normalMap.w == 1) or just a single one (normalMap.w == 0).
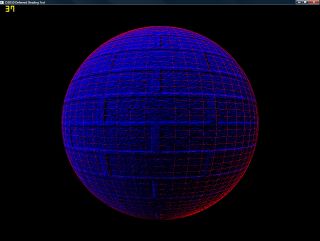
Here is a visualization:
I’ve tinted it red where extra work is done (the shading is done per-sample) and blue where shading is only done once.
This didn’t have the massive performance boost that I was expecting – I figured having a single pass through almost all samples then only loading them as-needed would save massive amounts of texture bandwidth during the lighting phase, as well as cutting down on the processing.
I was half-right.
In fact, the performance boost was much smaller than expected. The reason is, I’ve guessed, is that when caching the multisample texture, it caches all of the samples (because it’s likely that they’ll all be read under normal circumstances), so it really doesn’t cut down on the memory bandwidth at all. What it DOES cut down on is the processing which, as the lighting gets more complex (shadowing is added, etc), WILL become important. Also, since my shader is set up to be able to do up to 8 lights in a single pass, It renders 25 full-scene directional lights (in…4 passes) at about 70fps with 4xAA at 1280×964 (maximized window, so not the whole screen) on my 8800GTX. As a comparison, it’s about 160 fps without the AA.
With a more reasonable 4 lights (single-pass) it’s 160fps at that resolution with AA, and 550 without. Not bad at all!
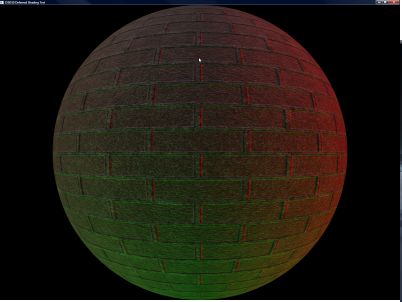
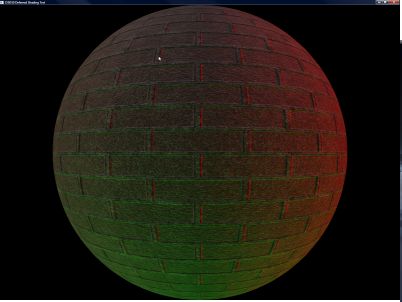
Here are two screenshots, one with AA, one without (respectively). Note that they look exactly the same in thumbnails. I could have probably used the same thumbnail for them, but whatever 🙂


