This will probably be the norm for a while, unless I find myself with an excess of time some night; there’ll probably just be some project updates for a few weeks.
Progress on finishing the first level is going good, all of the main enemies are implemented, the level 1 boss is designed (but not yet coded), and I’m on my way towards getting the level done by the end of the month.
(Screens and videos below the fold)
I haven’t made any specific posts about my game in a while, so I thought I’d just make a quick status update.
Code Progress
Progress is coming along quite nicely. Most of the game systems are done (though I have some modifications to make to enable things like curved enemy beam weapons and side-by-side ship paths).
- Enemies have multiple ways of spawning, and can follow paths (or not).
- All four weapons are implemented
- The player can now die (and respawn). Lives are tracked (but the game currently doesn’t game-over if the player dies, as that would be a pain for testing).
- The scoring system is in (with a first run at a score multiplier system).
- The on-screen display has been completely redesigned.
- Two players can play at once, which includes a special combination lightning attack that is even more devastating than the standard lightning attack.
(Screens and videos below the fold)
The .NET framework’s reflection setup can be amazingly useful. At a basic level, it allows you to get just about any information you could want about any type, method, assembly, etc that you could want. In addition, you can programmatically access type constructors and methods, and invoke them directly, allowing you to do all sorts of neat stuff.
One useful application of this is in the creation of state machines. Imagine an entity in a game that flies around in a pattern for a bit, then stops to shoot some bullets, then returns to flying. Such an entity would have two states, “Flying” and “Shooting.”
You’re flying your ship down a cavern, dodging and weaving through enemy fire. It’s becoming rapidly apparent, however, that you’re outmatched. So, desperate to survive, you flip The Switch. Yes, that switch. The one that you reserve for those…special occasions. Your ship charges up and releases bolt after deadly bolt of lightning into your opponents, devastating the entire enemy fleet.
At least, that’s the plan.
But how do you, the game developer, RENDER such an effect?
Yikes, I’m getting backlogged on the stuff I want to write about!
Anyway, this will probably be way shorter than it deserves, but my memory on the subject is about 3 months old. Basically, this will be more or less a short chronicle of the dumb story of the mesh vs. mesh tests.
Appearances Can Be And Are Frequently Deceiving
When I started work on the collision detection observation, there was one surprising fact: the mesh vs. mesh code (used to determine whether the player was intersecting enemy ships) was working at full speed! I didn’t seem to have to do any optimization at all on it to get it working.
I did, however, opt to go ahead and change the functions to not be recursive (as the current implementation was, of course, recursing into both meshes’ sphere trees). When I finished that work, suddenly, the routine was much, much slower. Was, in this case, the recursion overhead better than what it took to handle the double tree recursion in a non-recursive way?
I have been hard at work on my game (in my ridiculously limited spare time) for the last month and a half. One major hurdle that I’ve had to overcome was collision detection code. Specifically, my collision detection performed great on my PC, but when running it on the Xbox 360, everything would slow to a crawl (in certain situations).
The types of collision detection I have to deal with are varied, due to the weird way that I handle certain classes of obstacle (like walls):
- Player bullets vs. Enemy – Player bullets are, for simplicity, treated as spheres, so sphere/mesh testing works here.
- Enemy bullets vs. Player – Same as above.
- Player vs. Wall – Because the game’s playing field is 2D, the walls in-game are treated as 2D polygons, so it boils down to a 2D mesh vs. polygon test.
- Player vs. Enemy – Mesh vs. Mesh here
- Beam vs. Enemy – The player has a bendy beam weapon. I divide the curved beam up into line segments, and do ray/mesh tests.
The worst performance offender was, surprisingly, the sphere vs. mesh test, which will be the subject of this article. Before optimizing, when I’d shoot a ton of bullets in a certain set of circumstances, the framerate would drop well into the single digits, because the bullet vs. mesh (sphere vs. mesh) collision couldn’t keep up. Here are the things that I changed to get this test working much, much faster.
For those of you not using Direct3D 9 or XNA, you can safely ignore this post (OpenGL and Direct3D 10 are immune to this particular oddity). However, if you are, it’s likely that you’ve had to deal with the dreaded half-texel offset. Today, after I don’t know how many years of using Direct3D, I came to realize that I really didn’t understand what the source of the issue was. Now that I’ve sort of gotten a handle on it, I figured I’d post it to my super new journal. Consider it a test run.
Coordinate Spaces
The first thing to note is the basic coordinate space. I’m going to be referring to texture space and clip space a lot, so I thought I’d just do a quick refresher here on what I mean (mostly to make sure you’re thinking with the same terminology that I’m using).
- Clip space – the post-projection half-cube of space where X,Y in [-1…1] and Z in [0…1]
- X = -1 is the far left edge of the screen
- X = 1 is the far right edge
- Y = -1 is the bottom edge
- Y = 1 is the top
- Z = 0 is near (the near plane)
- Z = 1 is far (the far plane)
- Texture space – the area where u,v in [0…1] on a texture map making up a single end-to-end repeat of the texture.
- 0,0 represents the upper-left coordinate on the texture
- 1,1 is the lower-right.
Okay, I’m back! Sorry for the delay, my job got super-crazy there for a month or so. It hasn’t really let up too much, but it’s enough that I was able to get a little bit done. However, nothing really to show for it, I’m afraid.
But, I do have SOMETHING interesting: a look into the HUD design process. This work was done almost a month ago, but I haven’t had time to even sit down and write this entry until now.
Necessary elements
There are a few elements that are necessary on the in-game HUD:
- Player name – Especially important in two-player mode, having both players’ names on-screen will help to differentiate which statistics belong to which player
- Lives – Also very important is the number of lives that a player has.
- Score – Points. Very important.
- Weapon Charge – You’ll acquire weapons charge throughout the course of the game, which you’ll be able to spend to temporarily upgrade your weapons. This meter will show you how much charge you have. I chose to represent this with a blue bar.
- Secret Charge – I’m not quite ready to divulge this little gem, but this meter only fills up when the blue (weapon charge) meter is completely full. I chose yellow for this one.
(Mockups of the design process below the fold)
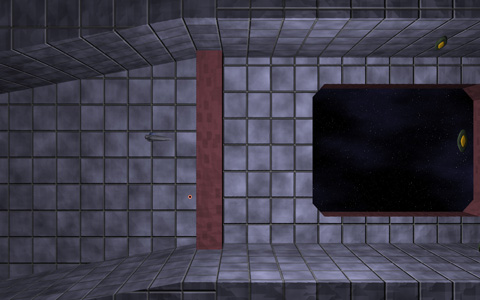
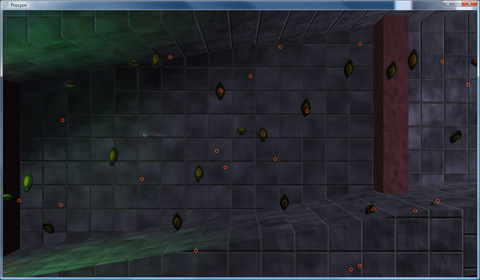
This previous weekend, I was able to accomplish another major milestone in game development: The Scrolling Background ™ © ® (BBQ).
Here it is: another late-week journal update that pretty much chronicles my weekend accomplishments, only later.
But First, Beams!
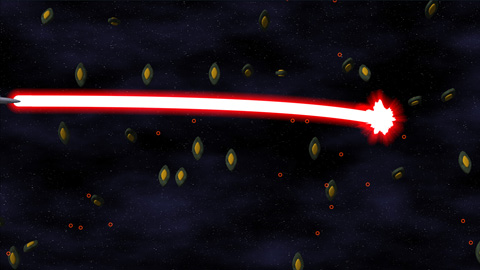
First up, here’s a preview of the powered-up version of the final main weapon for the project:
The beam itself actually locks on to targets and continually damages them. Implementation-wise, it’s a quadratic bezier. Initially, I tried to calculate the intersection of a quadratic-bezier-swept sphere (i.e. a thick bezier curve) and a bounding sphere exactly. That’s all great, only it becomes a quartic equation (ax^4 + bx^3 + cx^2 + dx + e == 0), which is ridiculously difficult to compute programmatically (just check the javascript source on this page to see what I mean). So I opted for another solution:
I divided the curve up into a bunch of line segments, treated those segments as sphere-capped cylinders (capsules), and did much simpler intersection tests. PROBLEM SOLVED!
When Is Deferred Shading Not Deferred Shading?
I also implemented Light Pre-Pass Rendering, which is sort of a “Low-Calorie Deferred Shading” that Wolfgang Engel devised recently. Considering my original plan for lighting was to only allow right around 3 lights on-screen at a time, this gives me a much greater range of functionality. It’s a three-step process, as illustrated below.


